My MGB buddy Bill S. (bringing his new-to-him '73 with him, which he figuratively stole from someone who redid all the mechanicals and interior - nice ride, Bill!), came over to check on my project progress - which wasn't much.
But I showed him my fender beads, which had been eaten away by rust in spots. They looked bad. My original plan was to fill them with an all-metal filler, then shape them back into the original shape. I gave that a try, but didn't like the results - just too fine a feature to try to reproduce in filler, or well beyond my skills, or both.
Showing my crappy beads to Bill was just what I needed to commit to replacing both of them.
So I did a little research. The beads are available from Moss, and there's a procedure for replacing them.
Lindsay Porter describes one approach in "The Car Bodywork Repair Manual", which is basically to grind the existing bead off, cut the top off a replacement bead, and solder it in place.
There were also a couple of approaches written up in the MG Experience Forums, that were basically updated versions of Porter's approach, using epoxy/panel adhesive instead of solder, with or without including a portion of vertical leg of the T in the repair.
To review, the fender bead is a T-shaped strip of metal, the vertical 'body' of which is sandwiched between the outer fender and the cockpit/boot surround stamping. The three pieces are spot-welded together, reportedly. I have no idea how the factory got a spot-welding tool in there, which is why nobody tries a total replacement.
Anyway, after doing my homework I went to work.
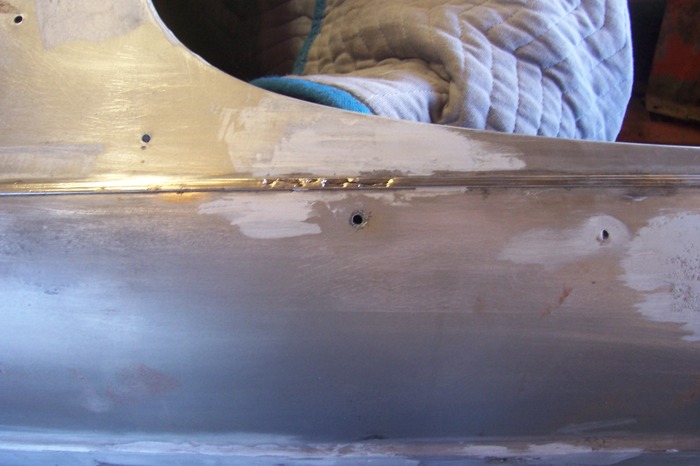
Top View: Rust removed, revealing corroded MGB fender bead. Common problem, which is why replacements are available.
Fender Bead Replacement Procedure
- Grind off the old bead. A grinding wheel in an angle grinder handles this easily. Focus on the middle of the top of the 'T', and the arms will basically fall off as you grind down.
- That leaves the vertical 'body' of the T, sandwiched between the body panels. I used a cut-off wheel in the angle grinder to grind out a portion of that vertical piece, about 1/4" or so of it. You've got to be careful to not go too deep, messing up the spot-welds holding the panels together, nor get too wide and cut the panels instead of the 'T' body. Go slow, stay centered, and it's very doable.
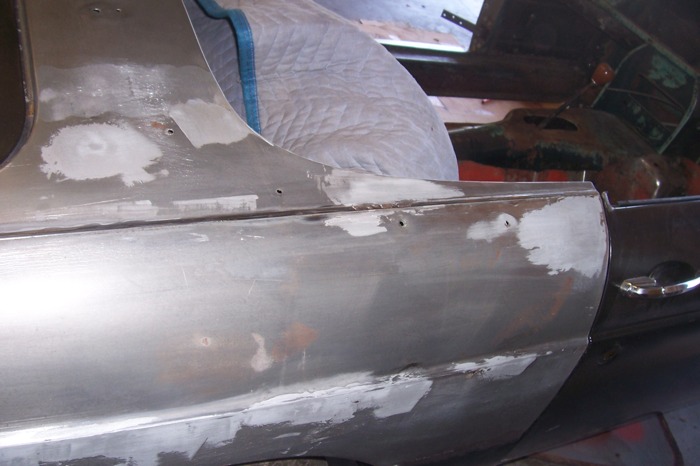
Grinding out the remaining fender bead, leaving a narrow groove
- Take the replacement bead, and again using the cutoff wheel, slice off the T body so that it's no longer than the depth of the groove you've just created - about 1/4" or so. Leaving some of the body gives the T some stiffness, without it, it will tend to want to roll up. It also gives you more glueing surface.
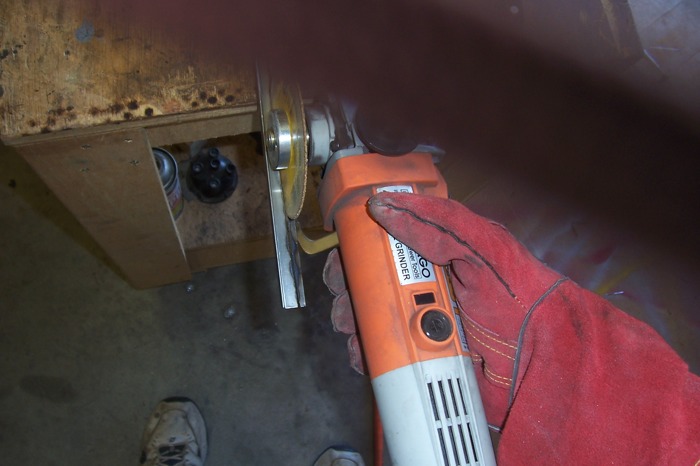
Shortening the vertical part of the replacement MGB fender bead, to fit in groove
- Lots of test fits to make sure you've got a good fit. I tried some pre-bends in the bead, carefully, so that it followed the top contour and didn't need a lot of force to keep it in place. That simplifies the clamping process while you wait for the adhesive to cure. Make sure you keep the bead protected while you're working it, it tends to want to rust pretty fast if not. If you're working in a hot Tulsa garage, and sweating on it, it rusts REALLY fast. I used Picklex 20 to protect the bead.
- I had some holes in my 'slot' where the corrossion that messed up the original bead had eaten either the floor or the sides out of the 'slot' where the replacement bead would be glued in. This slot needs to hold the adhesive in place, so I rebuilt the corroded-out sections with JB Weld - the 'stick' kind where you cut off a piece, knead it to combine the epoxy and hardener, and then shape it in the 5 minute work time that you have. There was just enough access through the side panel, and I used a 2" section of spare bead to give me something to work the JB Weld around. It wasn't perfect, but it worked.
- I used 3M Automix # 8115 adhesive to glue the bead in the groove. It's a two-part epoxy, and uses a special calking gun that sells for around $90, and mixing tips for application. It comes in 200 ml 'siamesed' calking tubes. This is very good stuff - I tested it on a small piece of sheet metal, and after a few hours it was on there for good. I suppose any good epoxy would work, this isn't the toughest application in the world, it's non-structural and all that. But Bill (see above) had a couple of tubes and a gun to loan me, so it was very convenient.
- Set up the gun/tube/tip. The only trick is to run a bit of adhesive out before you put the tip on, just to be sure that you don't have a void in either of the two parts, so they mix correctly in the tip. Put the tip on, and go to work. You've got to go slow, because the tip is just about exactly the width of the groove you're trying to fill. And fill it, you ideally want a little bit of squeeze out, to ensure that the arms of the 'T' are glued to the top of the fender, minimizing the risk of moisture getting under them and rotting them out again. I filled the groove so that it was even or slightly over-full, and ran a knife blade down the groove (again, slowly) to ensure that I didn't have any air trapped under the adhesive.
- You've got lots of work time with this adhesive, so no need to rush. Fit your prepped bead into the groove, and start to clean it up. I used paper towels and lacquer thinner from a spray bottle. Don't wait forever to clean up the squeeze out, after a few hours you'll likely have to sand it off.
- I used quart cans of paint, a BFH, some gallon gans of thinner, etc, to hold the bead down while it cured. After I bit I also used duct tape at the ends where I couldn't balance any of the weights.
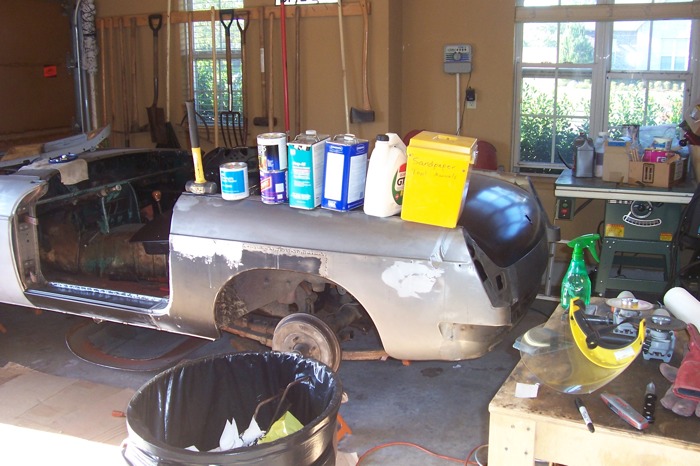
Weighing down the new fender bead while the glue cures
- The finished product is shown in the photo below. I feel good about my new beads. I think they're important to the look of the car, and the new beads are 100% better than my old, 'filled' beads. Progress, I love it.
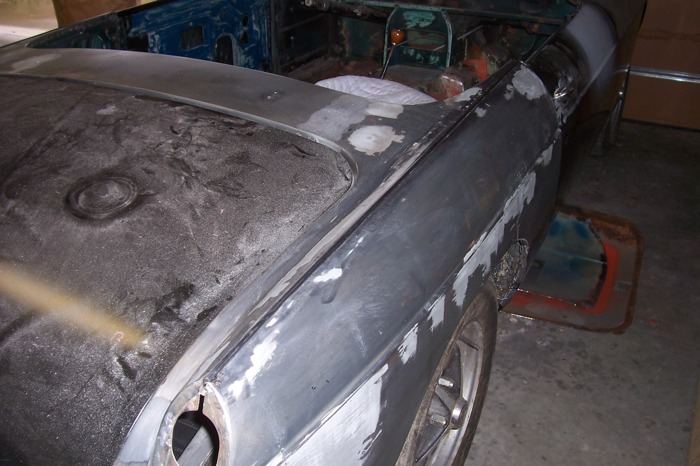
New MGB Fender Bead Installed, ready for primer and paint
Addendum: About a week after finishing this job I was browsing in my local autobody/paint store and ran across a family of body panel adhesives from Evercoat - info available in this MG Experience Forum Topic. They are two-part epoxy based adhesives, like 3M Automix or Fuzor, that are packaged in a standard calk tube that fits in a standard calking tube gun. They use the same kind of mixing applicator tip that Automix uses. Very clever packaging, and something to try if you don't have an Automix or Fuzor gun available to borrow, and don't want to spring for a $60 to $90 gun that you may only use once.


Want to leave a comment or ask the owner a question?
Sign in or register a new account — it's free