As most of us LBC old timers know, the Moss Motors MG catalog has little tech tips scattered throughout which are actually fairly useful. So to keep you from having to thumb through the catalog to find one in particular, I've transferred them all her on one handy page that you can print out. The best way would be to copy the text and paste it into your own word processing program.
Originally published in the Moss Motors MG Catalog. Many of the tips came from customers, so the information itself does not belong to anyone but the owners of the vehicles. The original intent to pull this information together was to make it easier for owners to keep their cars running and enjoyable, so the more it is distributed, the better (see license at the top of the page).
MGB Windshield Replacement
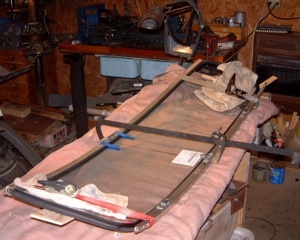
Replacing the windshield on an MGB roadster can be completed with a few simple tools and a reasonable amount of patience. Having a good workshop manual is a must (see the color section at the front of this catalog).
Removing the windshield assembly is a simple task. Loosen the two bolts securing the bottom center rod bracket to the dash top. Leave the center rod assembly intact to hold the windshield assembly together. Remove the four bolts securing the windshield pillars to the body. Completely remove the center rod bolts. Withdraw the entire windshield assembly from the car.
Begin dismantling the windshield by removing the rear view mirror and visors. Remove the nuts and washers securing the center rod to its top bracket, and withdraw the rod through the bottom bracket. Unscrew only the outer three screws securing the top rail to each pillar. The long outer screw on each side is a Moss #408-057, the two short inner screws on each side are Moss #408-056.
Peel back the frame to body seal (Moss #282-410) just enough to remove the two screws on either end of the bottom rail. With a soft mallet, gently tap the pillars free of the glass and rails. The top and bottom rails can now be removed. Peel the glazing rubber away from the glass.
Inspect and clean the top and bottom rails. Check the corner brackets on the pillars. Mark the center of the new windshield glass with a crayon so it will be more easily lined up with top and bottom rails.
Place the new glazing rubber (Moss #282-420) around the windshield glass. Inject a bead of windshield sealant into the groove in which the glass sits. Lubricate the outside edge of the glazing strip and the inside of the top and bottom rails with a soapy water solution. Push the top and bottom rails into place slowly.
Fit the side pillars into place. (If the top and bottom rails are not pulled together enough, then temporarily assemble the center rod or use a carpenter’s wood clamp to gently ease the rails closer.) If the side pillars balk, try tapping with a soft mallet. Again, be sure to go slowly.
Once all frame members are in alignment, replace the screws in the proper holes. On the top rails, the short screws belong on the two inside holes on either side of the rail and the long screws go in the outermost holes on each side. Attempting to use the wrong screws may easily result in breaking the glass.
With the windshield firmly assembled, scrape off the excess sealant and refit the center rod. Refit the frame to body seal. If replacing this seal (Moss #282-410) is necessary, now is the time to do it. Lubricate the bottom channel with a soapy water mixture and slide the leading edge of the seal into the channel while easing the seal along carefully where it enters the channel. This is a very slow process. Replace old windshield pillar grommets: L/H, Moss #282-450; R/H, Moss #282-460.
Apply a bead of sealant to the top of the grommets before sliding them into place on the pillars. Apply another bead of sealant to the bottom of each grommet and along the flap of the frame to body seal. Ease the windshield assembly back onto the body.
The windshield should not be forced into place; it is better to let it sit overnight to compress the new rubber seals. Tighten the pillar bolts one at a time while checking and adjusting the fit to the door vent windows. Once in place, recheck the fit to the vent windows and top. Check the seals between the pillar and vent windows and top. Replace if necessary with two of Moss #282-400.
Finally, refit the mirror and visors. If done patiently and carefully, the roadster windshield should now be draft and leak-proof. A good source of information about MGB restoration is Lindsay Porter’s MGB Guide to Purchase and D.I.Y. Restoration, Moss #211-365.
Proper Use of the Manual Choke
The manual choke, fitted in the upper right hand corner of the MGB dashboard, controls two distinct functions of the S.U. carburetors. First, one can feel the accelerator pedal being pulled away from the foot as the choke is pulled out. The first third of the travel of the choke cable works the fast idle only. The second two-thirds controls the mixture enrichment, as well as the fast idle.
The second function is the mixture enrichment. The colder the engine and surrounding air, the greater the need for more gasoline to be mixed with the air at the carburetor. As the engine warms, the need for a richer mixture lessens.
When starting the MG, always pull the choke completely out (unless the engine is still very warm from recent running). Once the engine has started, the driver must release the choke in small increments as the engine warms. The trick is to release the choke at the proper rate. If released too soon, the engine will cough and spit, especially under acceleration. If released too slowly, the engine will "load up" and run roughly, especially while idling. By the time the temperature gauge is halfway between cold and normal, the choke can usually be released completely. If the choke is left out too long, the extra gasoline can mix with the engine oil by "washing down" the cylinder walls. If your choke does not seem to be operating correctly, consult your workshop manual for adjustments.
Are You Rebuilding Your Carburetor?
An often overlooked aspect of carburetor rebuilding is the replacement of the throttle shaft bushes in the carburetor bodies. As the throttle shafts and bushes wear, they both become slightly egg-shaped, causing a variable vacuum leak which produces erratic idling of the engine, poor performance and in extreme cases, overheating, "running-on" and possible burned valves due to an excessively lean mixture.
Since most S.U carburetors have bushes cast in the bodies, replacement of the bushes requires machine shop facilities to bore out the old bushes to slightly less than the O.D. of the new bushes, press in new ones and drill and ream them to fit the new throttle shaft, ensuring all the while that the machined bores of the new bushes are in perfect alignment. Bushes are available under part #372-545.
Alternatively, if your throttle shafts are still stock diameter (.310"), it is usually possible to fit special oversize throttle shafts to S.U. carbs. We offer a special reaming tool (part #386- 385) to enable owners to fit their own .010" oversize shafts which can save considerable money on machine shop labor.
Tuning the Zenith-Stromberg Carburetor
Despite the assurances of the manufacturer that this single carb. could lessen emissions, the Zenith-Stromberg often runs very rich. When this occurs, and if the air pump and catalytic converter are still in place, the converter will glow cherry red hot. With regular maintenance, this carb. will perform properly, offering relatively high mileage compared to the twin SUs.
Adjusting the Zenith-Stromberg Carburetor
To properly tune the Stromberg, one must have the Stromberg adjusting tool (Moss part #386-310), a l0mm open end wrench, and small and medium screwdrivers.
Start the engine from cold, and adjust the spring-loaded idle screw for an engine speed of 1800 rpm maximum. Once the engine has fully heated and the speed dropped to its lowest rpm (choke all the way off), adjust the locknut screw (hence the l0mm wrench) until the engine is idling at about 850—900 rpm. All further adjustments to idle speed will be made again with the spring loaded screw.
Now the mixture is adjusted. Lift the air piston slightly. If The idle speed rises as the piston is lifted, the mixture is too rich. Turn the allen wrench anti-clockwise to lean it out. If the idle speed slows or stumbles when the piston is lifted, then the mixture is too lean. Turn the allen wrench clockwise to richen it. With the proper idle mixture the idle speed will rise and steady, or rise and slowly fall off as the piston is lifted. As the correct mixture is reached, the idle speed will rise, and several adjustments may be necessary to maintain 850—900 rpm. Be certain to rev up the engine, to clear it out, between each adjustment.
Running Rich
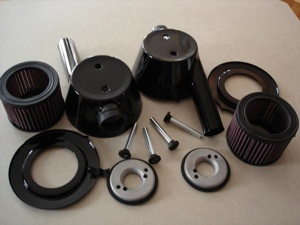
The most common complaint is that no matter what is done, the mixture is still far too rich. There are five major areas of concern:
- The air cleaner is dirty. Leaks in the manifold or exhaust will soot up an air cleaner. This causes a much higher vacuum in the venturi, and more gasoline is drawn into the air stream.
- The ELC (Evaporative Loss Control) system is pressurized. This is very uncommon. Remove the vapor line, the vent line, and the carburetor overflow line. This travels across the valve cover to the charcoal adsorption canister. There should be NO CHANGE in the idling of the engine. If there is any change, clean the ELC system, and check for blockages. It is more common for this system to develop a vacuum which creates a lean running condition.
- The automatic choke is the most common cause of rich running. These problems are:
- The choke ass’y. has come loose from the carb. body. The vacuum from the carburetter thendraws fuel from the float bowl around the valve which should be closed during warm running. Tightening the three slotted copper coloured screws eliminates this as a problem.
- The choke lever and cam have stuck in a part-open position. A good tune-up requires removal of the choke assembly , thorough cleaning, tightening the pin nut, and lubrication.
- The bi-metal spring in the heat mass is not correctly calibrated. Place the heat mass in a pan of boiling water; the bi-metal spring will rotate clockwise to its fullest extent. The notch on the bi-metal spring should be in line with the mark on the aluminum housing. If it does not line up, scribe a new mark. The line on the heat mass, on the black plastic insulator, and the choke body should all be in line.
- The small passageway from the carb throat (past the butterfly) to the top of the auto choke ass’y. allows vacuum to pull off the spring loaded enrichment plunger. When this passageway fills with soot , the plunger remains seated, holding the choke ON. By cleaning this passageway with a small wire, the vacuum can take its proper route.
- The mating flange of the auto choke can become warped and allow fuel to bypass the choke valve. Resurface this mating flange and thoroughly clean after the surface is smooth.
- Occasionally the brass choke valve is not fully inserted into the housing, so that the choke pin does not seat in (and therefore not closing off) the choke. This can be positively determined by removing the automatic choke and covering the screw holes and fuel passageways with a piece of masking tape, then checking the mixture again.
- If the rubber diaphragm is torn or perforated, then the engine will run very rich, and maximum speed will be limited, spewing clouds of black, sooty, uncombusted exhaust. A torn diaphragm is easily found by removing the top of the suction chamber (four phillips screws). While the diaphragm is being inspected, pay attention to the following:
- The tiny pin which retains the metering needle can break, allowing the needle to pop upwards. Adjusting cannot correct this. The needle’s shoulder should be seen on the bottom of the air piston. If not, and the needle has a lot of up and down movement, check the pin.
Running Lean
Leanness at road speed is often described as a hesitation, as if a wind was blowing against the car. Causes can be retarded timing or a too lean mixture. There are several possibilities:
- The ELC System is plugged, placing a vacuum in the float bowl. Remove the vent line from the carb. and note any change. A plugged charcoal adsorption canister, or a plugged vent line from the bottom of the anti run on valve are the most common problems.
- The float height is set far too low.
- The air cleaner is not fitted to the carburetter. The Stromberg carburetted MGB will not run with the air cleaner removed, nor with a filter which replaces the original assembly.
Carb Will Not Idle Down
Sometimes the carb. will not idle at lower than 1000 or 1200 rpm. This is almost always a mechanical problem, but the possibilities include:
- The throttle cable is stiff or incorrectly adjusted. Leave loose until the carb is adjusted, then tighten.
- The automatic choke cam is not returning to full off position. Levers may be bent or jammed.
- The overrun valve in the throttle disc may "float"; the spring may have lost its force due to a carb. fire or other gross overheating. Replace or solder shut.
Clutch Replacement
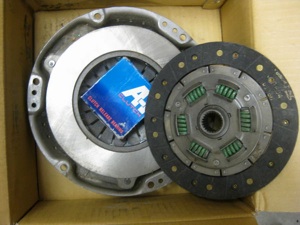
Insert your clutch alignment tool through your new clutch disc, push the tool into the pilot bushing in the crankshaft, then press the disc up flat against the flywheel. Locate the new pressure plate on the two dowel pins, install the six bolts just a couple of turns each. Now, by exerting appropriate sideways pressure on the handle of the alignment tool, position the disc so that you can slip the tool in and out of the pilot bushing with minimal drag on the splines. There is one spot, with the disc perfectly centered, where virtually no resistance will be felt. Once the disc is in the position, tighten the bolts one turn each at a time until they are all fully secure. The tool should still slip in and out very easily; if it doesn’t, repeat the procedure until it does. If the tool meets no resistance, the gearbox input shaft will go in equally easily.
Install your new throwout bearing, being sure to lightly grease the points where it pivots in the yoke. Wire-brush the splines on the gearbox input shaft, then give them a very light coat of white lithium grease. Finally, grease the nose of the input shaft where it runs in the pilot bushing. When reassembling the engine to the gearbox, be sure to get the face of the bellhousing parallel to the rear engine plate once the input shaft splines enter the clutch disc; it will then slide all the way home without the need for brute force.
Clutch Problems
Clutch problems fall into three categories:
- The clutch does not release properly when the pedal is depressed, resulting in difficult engaging of gears.
- Clutch slip, a condition where the engine speed increases when you give the car gas while in gear, but the car does not speed up accordingly.
- Clutch judder, where the car does not take up smoothly as you let the clutch out.
Problem "a" is usually caused by faulty hydraulics. First, check that there is sufficient fluid in the clutch master cylinder. If the level is low, look for leaks at the master cylinder or slave cylinder, and rebuild or replace these cylinders as necessary. If the level is okay and there are no leaks evident, bleed the system to ensure there is no air present. Check that the flexible hose has not deteriorated; watch to see that it does not expand in diameter while a colleague pushes the clutch pedal. If the hydraulics are working properly, the end of the throwout fork arm should travel 3/8". If the clutch does not release properly, even though the hydraulics are working correctly, either the throwout bearing is completely worn out (so the pressure plate is not being pushed far enough to release the disc), or the disc itself is hanging up. Either of these problems require that the engine be removed to inspect and remedy the situation.
Problems "b" and "c" both require that the engine be removed to get at the clutch. Clutch slip results from the disc being worn out or oily, (which also causes judder,) or the pressure plate springs being weak. Since getting to the clutch is such a labor intensive operation, we strongly recommend replacing the disc, pressure plate and throwout bearing if you have a mechanical problem with your clutch. Excess play of the lever will cause premature wear on the throwout bearing. A new throwout bearing has 11/64" of carbon thrust face exposed from the metal body; if yours has 1/8" or less, it should be replaced, too. If your disc has worn so far that the rivets are exposed, check the face of the flywheel for grooves, it must be removed and resurfaced if the surface is scored noticeably.
Special Note: MGB starters have a habit of chewing up the flywheel ring gear. While doing a clutch job, always check the ring gear for damage to the teeth, and have your machine shop install a new one if significant damage is present.
Steering Rack Boots
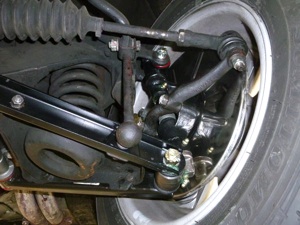
Like so many mechanical parts, rack-and-pinion steering requires two things to work efficiently: The presence of oil and the absence of water and dirt. Given these two conditions, a steering assembly should last hundreds of thousands of miles.
However, periodic attention is necessary to a very vital part of the steering: the rack boots (or seals, or bellows, or gaiters, or whatever you call those collapsible rubber things on each end of the rack). If these are split and leaking oil, the life of the rack-and-pinion is diminished every time you drive the car, especially if you drive on wet or dusty roads.
While the boots themselves are relatively inexpensive, many owners put off replacing the bad ones because a) it is a dirty job, and b) they know it will upset their steering alignment. The simple answers to these objections are a) but someone has to do it, and b) not necessarily. If your alignment is correct and your steering wheel is centered (see tech tip in the next column on this page), following the procedure outlined below will get you your new boots fitted without the need for realignment.
- Jack up the front of the car and position two jack stands under the chassis.
- Center the steering wheel in the dead ahead position.
- Place a strip of masking tape on the front of each tire’s tread. Mark each piece of tape and measure exactly between the marks. Write down the measurement.
- Remove one wheel.
- Loosen the tie rod lock nut.
- Remove the nut holding the tie rod end to the steering arm.
- Use a tie rod end separator or a "tuning fork" ( aka. "pickle fork") to separate the tie rod end from the steering arm. If using a "tuning fork", try not to rip the rubber boot nor scar the steering arm. Alternatively, hold a heavy (2 - 3 lb.) hammer or similar hard heavy object against one side of the "ring" end of the steering arm where the tie rod end is mounted, and sharply strike the opposite side with a lighter hammer. The tie rod end should then pop out of its tapered seat in the steering arm. (Tie rod end service tools are available at most automotive parts suppliers and tool suppliers.)
- Unscrew the tie rod end, noting exactly how many turns it takes to get it off, then unscrew the lock nut. (An error of less than 1/2 turn will upset the alignment.)
- Undo the clamps on the old boot, remove the boot.
- Clean off all the dirt and old oil or grease.
- Install the new boot; don’t tighten the small clamp yet.
- Replace the lock nut on the tie rod, then screw the tie rod end back the number of turns it took to get it off.
- Reassemble the tie rod end to the steering arm.
- Replace the wheel.
- Check that the steering wheel is still centered exactly as it was when you started.
- Measure between the tape marks. Adjust the tie rod in or out of the end until the measurement is exactly what you started with.
- Tighten the tie rod lock nut, then the small boot clamp.
- Repeat for the other side.
- Fill the steering rack with SAE 90 gear oil, as per your shop manual. Using grease will not do! (Replacement racks are pre-lubricated, cannot be re-lubricated.)
Centering Your Steering Wheel
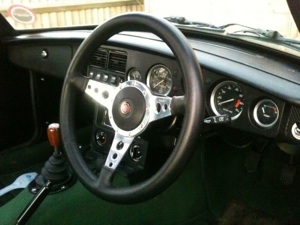
If your steering wheel is not perfectly centered, you can correct it without too much effort. First, you need to make sure all your tire pressures are set correctly, then find a wide, flat, traffic-free area (such as a deserted parking lot). When you drive "hands-off", the front wheels will assume their most centered position because of the caster that is built into the steering. On a cambered road, there will be a slight pull from the road’s camber, so you need a flat road for best results.
When you have determined the exact position of the steering wheel with the car going straight ahead, you can begin the centering procedure. If it is more than an inch or so off at the rim, start by checking whether your wheel is mounted on splines or a type with keyway. If it has splines, try getting it closer to center by moving it on the splines. If it is the keyway type, check whether any of the other connections in the steering column can be repositioned to center the wheel better.
Final centering can now be done by adjusting the lengths of the tie rods. If the wheel is off to the right, you can move it counterclockwise by shortening the left tie rod and lengthening the right one. If it is off to the left, shorten the right tie rod and lengthen the left one. Count the number of turns so that you move each tie rod the same amount, to preserve your toe-in setting. Small increments move the steering wheel rim a surprising amount, so make your adjustments little by little. Drive the car after each adjustment to see where the wheel now centers itself. When it is dead-center, make sure you remember to tighten the lock nuts on the tie-rods.
If your toe-in is correct before you start the centering procedure, you can save having to readjust it by placing two pieces of tape on the front tire treads and measuring the distance across them before you start loosening the tie rods. As you do your centering adjustments, make sure the distance between the tapes remains exactly the same.
Brakes
Pulling to one side under braking can be caused by several factors. If your car has this dangerous habit, check the following:
- Tire pressures set incorrectly
- Unevenly worn or mismatched tires
- Worn or loose suspension components
- Worn or loose wheel bearings
- Worn or oily brake pads or linings
- One wheel cylinder or caliper stuck or working less efficiently than the other.
Crack of Doom
To prevent the "crack of doom" on MGB doors just behind the vent window frame, ensure that the car’s doors are properly hung, adjusted, and hinges lubricated. This does need periodic attention due to hinge wear. Also, don't pull on the vent window to close the doors!
Positive to Negative Ground Conversion
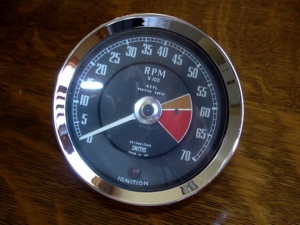
You can fit modern stereo systems, power antennae, CB radios, etc. to your pre-1968 MGB if you change from positive to negative ground. This is easily done!
- First you must change your battery cables or clamps so they will fit on the opposite terminals.
- Leaving them disconnected, now reverse the positions of the two wires connected to your ignition coil.
- Next, the generator must be re-polarised. Disconnect both generator leads. Take a piece of 14 gauge wire and attach it to the main "hot" terminal of your starter solenoid or to a "hot" terminal on your fuse block. Reconnect your batteries in the new configuration (with the negative post going to ground).
- Now take the loose end of your 14 gauge wire and flash it once or twice against the field (smaller) terminal of the generator, just enough so you can see a small spark. (Do not connect this wire to the generator, even for a few seconds.)
- Now remove the 14 gauge wire, and reconnect your generator leads.
- If your car has an ammeter or voltmeter, simply reverse their leads.
- Wiper and blower motors need no changes.
- Original pre-1968 S.U. fuel pumps are not polarity sensitive, but modern S.U. replacements are, and must be replaced with negative ground S.U. pumps. You are now finished, unless you have a 1965-67 car with an electric tachometer.
To convert the tachometer, John Twist offers the following advice:
Two changes are necessary to completely convert your early positive ground electric tach:
- The wires must be reversed at the "white wire loop" at the back of the unit, and
- The power and earth connections must be reversed inside the case.
Step A: The wire in the "white wire loop" comes from the key switch and travels to the hot side of the coil. Referring to the illustration below, select one of the wires and tag it with two pieces of tape for identification. Then, cut the wire between the pieces of tape, and cut the other wire to the same length. Reverse the connections (now there is one piece of tape on each wire) and solder them (remember, this is the power lead for the coil and is unfused). Tape up the connections carefully. When later replacing the plastic block on the back of the tach, ensure that the metal band around the block is carefully positioned. This is a necessary part of the electromagnetic pickup.
Step B: To reverse the power wire and earth wire inside the unit, it is necessary to remove the chrome ring, the glass face and the glare shroud. The chrome ring is usually removed with great difficulty by prying the tabs with a small screwdriver, then rotating until the tabs can fit through the slots in the case. Remove the two screws on the back of the unit that hold the internals to the case (not the two whose heads fit in holes in the case), and allow those internals to drop carefully into your hand. Don’t bend the needle! The spade terminal is the power connection. Just next to this is the earth connection. A resistor is soldered to one of these connections, and a green wire to the other. Unsolder these ends of the green wire and the resistor from their current positions. Resolder the green wire to where the resistor was connected, and the resistor to where the green wire was connected. Reassemble the unit after cleaning the glass.
Alternator Terminal Conversion
Most MGBs are wired for 5 alternator terminals. As the 5-terminal alternators are obsolete, 3-terminal alternators may be supplied. These wiring instructions provided by Lucas outline the conversion procedure. To wire a 3-terminal Lucas alternator in place of the now obsolete 5-terminal alternator, use plug kit #540-280 and proceed as follows:
- Disconnect battery.
- Cut off wiring terminal plugs from alternator wiring.
- Remove and discard link wire (see illus. above).
- Remove wiring harness tape, approximately 1 inch.
- Slide small insulator over remaining IND wire (brown/yellow), and solder to the small terminal.
- Separately tape them back onto harness; the small brown and black wires are not used, as they are no longer required.
- Connect the small brown/yellow IND wire to the small terminal on the alternator.
- Connect the large brown positive lead to either of the two large terminals on the alternator.
- Reconnect the battery.
Gauges
The electrically-operated gauges on MGBs are known to fail on occasion. Here is how you can pinpoint the cause and maybe fix the problem:
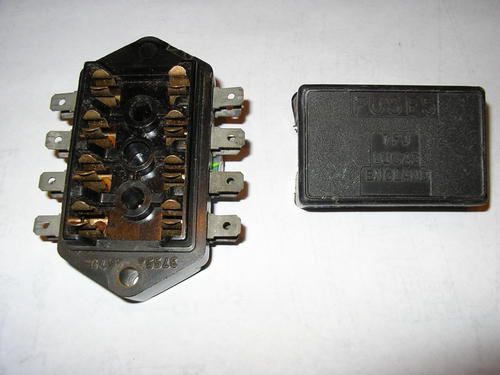
- All electrical gauges, turn signals, and brake lights quit. Probable cause is failure or poor contact of the "green/white" fuse. Locate the fuse block, check the fuse which joins a green wire and a white wire. Clean the clips with fine emery cloth, replace the fuse. If the fuse was "blown", there is probably a fault in one of the circuits it protects; try and narrow the field by trying the horns, turn signals, etc., until you find what blows the fuse.
- Fuel gauge doesn't work. Probable cause is a faulty voltage stabilizer (see page 86, #7 for listings). Stabilizer output should be 10 volts average. Since the stabilizer operates by making and breaking the circuit, the actual output fluctuates, making it difficult to measure with ordinary equipment. If there is no output, or the output is steady at battery voltage, the stabilizer is bad and must be replaced.
- Fuel gauge doesn’t work. Probable cause is a faulty tank sending unit; check as follows: Remove the green/black wire from the sending unit in the fuel tank. Connect one end of a test light to the terminal on this wire, the other end to ground. Switch on the ignition. Fuel gauge should begin a slow climb to full and the test light should glow. If the gauge does register, the sending unit must be bad; if the gauge still does not work it is either disconnected (check continuity of its wiring) or defective.
Sorting Electrical Problems
Sorting out electrical problems requires a step-by-step, methodical approach. It is necessary to identify the problem, examine the wiring diagram, then trace the circuit, connection to connection (usually from the hot side), until the problem is found. A quarter of all electrical problems arise from faulty battery connections; another quarter from a dirty fuse box.
As a rule: Wires do not fail. The bullet connectors may corrode at the ends of the wires (rarely), or the connections may be loose (common!), but the wires are usually OK.
Another rule: Wires begin and end outside the loom. There is no reason to cut through the PVC tape.
It may be easier to visualize the wiring as plumbing: Wires as pipes; switches as valves; the battery as pressure; and all "juice" must return to the battery.
Light bulbs work or not. A dimly glowing bulb indicates a faulty earth (ground).
Carb. cleaner removes paint or undercoating from wires to expose the true color code. If the trunk earth (ground) connection is loose or unattached (license holder bolts), the fuel pump, side markers, courtesy light, reverse lights, license lights, or tail-lights malfunction. If the hazard switch is not snapped off with vigor, the turn signals may not operate.
Tools: A 1 2-volt test light and wiring diagram are necessities before beginning.
Warning: Approaching an electrical malfunction without a test light, or helter skelter, is a certain route to madness.
Wiring color-coding
BLACK (B) Always EARTH (ground), unfused
Black (B): Various locations
Black/green (BG): URP switch to cooling fans
Black/white (BW): Brake warning light
BROWN (N): Always HOT, unfused
Brown (N): Various locations
Brown/light green (NLG): Windscreen motor switch
Brown/yellow (NY): Indicator light to alternator
Brown/purple (NP}: Unused
WHITE (W) HOT with ignition ON, unfused
White (W): Key to ignition relay, cut-off switch, fuel pump, ignition
ballast resistor, fuse box, various locations
White/black (WB): distributor to coil, coil to tachometer
White/blue (WU): Stepped down voltage for distributor amplifier
White/brown (WN): Ignition switch relay to fuse box, starter solenoid to starter relay,
		oil pressure sending unit to gauge (1968 - ‘69 only)
White/green (WG): Key switch to radio, HOT unfused at first key position; wipers and heater (earlier)
White/light green (WLG): Solenoid to coil, ignition ballast resistor to coil
White/red (WR): Key switch to starter relay, starter relay to brake warning diode
PURPLE (P) Always HOT, fused
Purple (P): Fuse box to horn, various locations
Purple/black (PB): Horn to horn switch
Purple/green (PG): Key buzer to time delay buzer
Purple/pink (PK): Key switch to key buzer
Purple/white (PW): courtesy lamp/boot lamp to earthing switches
GREEN (G) HOT with ignition ON, fused
Green (G): From fuse box to various locations
Green/black (GB): Fuel tank unit to gauge
Green/blue (GU): Temp. sending unit to gauge
Green/brown (GN): Reverse lamp switch to reverse lights; heater fan to switch
Green/orange (GO): Brake pressure switch, handbrake switch, brake warning diode, brake warning light
Green/pink (GK): Service interval counter (EGR light)
Green/red (GR): Left turn signals to switch
Green/white(GW): Right turn signals to switch
Green/yellow (GY): Heater to fan switch
RED (R) Parking lights, fused or unfused
Red (R): Fuse box to side markers, parking lights, switch to lights, 1963 - ‘69
Red/green (RG): Light switch to fuse box, panel rheostat
Red/light green (RLG): Wiper motor to switch
Red/white (RW): Panel rheostat to panel lights
BLUE (U) Headlamps, unfused
Blue (U): Light switch to dimmer switch
Blue/light green (ULG): Wiper motor to switch
Blue/red (UR): Dimmer switch to low beam
Blue/white (UW): Dimmer switch to high beam, high beam indicator
LIGHT GREEN (LG) Various applications
Light Green/black (LGB): Washer pump to switch
Light Green/brown (LGN): Flasher to turn signal switch, flasher hazard switch
Light Green/green (LGG): Voltage stabilizer to fuel/temp. gauges
Light Green/purple (LGP): Hazard switch to hazard warning lamp
SLATE (S) HOT with ignition OFF, fused and unfused
Slate (S): Key to in-line fuse
Slate/purple (SP): Fuse to anti-run on valve
Siate/yellow (SY): Anti-run on valve to oil pressure switch
YELLOW (Y) HOT in 3rd/4th, ignition ON, fused
Yellow (Y): Overdrive switch to relay, 1963 - ‘67; overdrive switch to 3rd-4th switch, 1968 - ‘76
Yellow/brown (YN): Driver’s seat belt to time delay buzzer
Yellow/purple (YP):
Electrical problems
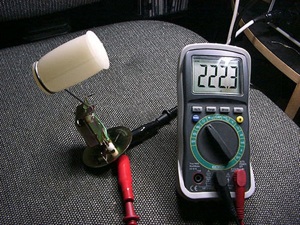
Does your car let you down every time you try to start it, or those wipers only work when it is not raining? Perhaps the indicators go dim every time you apply the brakes, and the horn only operates when the lights are off.
Before you go out to buy new lights, horns, switch gear, voltage rectifiers and anything else that carries an electrical current, it may be worthwhile spending time checking out the wiring rather than shelling out on new parts.
Quite often I have found that electrical components supposedly faulty, are perfectly all right, i.e., "blown" headlamps which are intact, switches that work when connected to a multi-tester, horns that stop making funny gurgling noises and operate correctly when connected to the battery for a test. Many electrical faults are caused by two frequently overlooked factors, either working separately, or together to produce a variety of interesting visual and sometimes pyrotechnic effects. The first of these factors is simply caused by age and the climate - electro-rheumatism if you like. The second is caused by that stalwart of the motoring world, Captain Accessory! I am always surprised by the large number of good quality products on the market (and\ this does include radios, etc.) which are let down either by the cheap, easy-to-use connectors sold with the kit, or by "hash wiring" on the part of the installer. Fitting any accessory should be dealt with in the same way that any other task should be undertaken on a vehicle - properly. Connections should be mechanically and electrically sound.
The worst electrical problems I have faced have been caused by "bodged" wiring or faulty connections. Easy-to-use connectors often provide me with hours of entertainment, as does unwrapping electrical insulation tape to find wires that have been just cut, stripped back and twisted together. It always works for a while! And it’s not bodged wiring - some products are of an appalling quality. For example, I have tried various different HT leads in my car to "improve the quality of the spark", "reduce resistance", and "provide better ignition". Most of these leads have been useless. It doesn’t matter two hoots that the PTFE casing and superior quality copper core offers less resistance than the normal standard item - what matters is that if the cap doesn’t fit the spark plug, it will just bounce off. One famous make had such appalling connections that it would not fit into the standard Lucas distributor. If you are going to tackle any electrical work for your car, then do it properly and do it once. Throw away those cheap connectors and get the right tools to do the job properly - because I can guarantee that if you don’t, that one day you’ll wish you had - or even worse, you’ll get rid of the car because it keeps going wrong. (I’ve picked up a few cheap cars like that which sing after two or three hours with a soldering iron!)
Get the Right Tools:
- Soldering Iron - Get one with: 5 to 15 watts output, stay clean tips, decent stand, and PTFE leads (which make the iron easy to handle.
- You probably already own one of those multi-purpose devices that cuts, strips wires and fits connectors. Throw it in the trash. Buy instead: Long Nose Pliers, Side Cutters, Wire Strippers, Insulation Tape, and Solder (60 - 40 lead/tin mix with flux incorporated).
- Connectors - Get the type of connectors that are already in use on your car - spade connectors and bullet connectors (that can be soldered) and throw the crimp connectors into a bin!
Three important safety tips:
- Disconnect the Battery
A fully charged battery can use around 120 amps to turn over a cold car engine.
Making a mistake and accidentally connecting the positive to the earth can have some interesting affects, i.e.:
- Any wire involved in a direct connection will act like a fuse and melt (this includes HT wire).
- The battery could explode if an HT wire does not fuse quickly enough.
- 120 amps is enough to weld your screwdriver to any object very easily.
- You can receive nasty burns if you use yourself as a suitable earthing point.
(Remember DC current differs from AC in that it does not change direction - once you get to grips with DC it won’t let go!)
- Holding the soldering iron
Never grab the soldering iron if it starts to fall. Sounds obvious, but there are still plenty of electrical engineers around who hold out their left hand when greeting somebody! - Suitable wiring
Finally, make sure that the wires you are using have the correct current capacity for the power they have to take. Using cable that is too thin is the electrical equivalent of reducing three lanes of motor way into one - total breakdown - if the current is much higher than the wire, the wire will act like a fuse and melt.
Making Connections
- Spade connectors
Strip back 1/4" of wire without ripping out half of the strands, (if you have never used wire strippers before, have plenty of practice with some old bits of wire) twist the strands together and solder the bare end.
Always heat the wire with the soldering iron and apply the solder to the wire while it is still in contact with the iron. The wire must be hot enough for the solder to flow into the wire strands - but don’t keep the iron there for too long, otherwise the outer sleeve of the wire will melt back. It is an art worth learning.
Do not apply solder to the iron and then try to "blob" the solder on to the wire - it never works because the solder "dries out" as the flux evaporates, and then the resulting joint can become brittle and prone to breaking (aka "Dry Joint").
Once cool, fit a spade connector sheath over the wire and then crimp the connector to the wire as shown in the diagram The crimping makes a mechanically sound connection, but this is not enough. Returning to the soldering iron, you then need to apply heat to solder the wire to the connector to ensure an enduring connection, just like they do at the factory. - Bullet connectors
Bullet connectors are needed where (A) two separate lengths of wire are to be joined together or (B) where an extra wire is to be added to a main feed.
Many bullet connectors can be crimped on as well as soldered to enhance the quality of their connection, but the stock items used by BL tend to be a bit more tricky and can only be soldered - so you must ensure that the soldered connection is not dry!
Strip back 3/8" of cable and solder the strands. Insert in the end of the bullet - it may help to "kink" the strands slightly to keep the bullet in place - and then re-apply the soldering iron to the top of the bullet. Allow it to heat up and then apply the solder through the hole at the top of the bullet so that it can run inside, attaching the cable to the wall of the connector.
The advantage of these connectors is that, if corroded, the connector block can be thrown away and a new one fitted without having to do any more soldering. Also, they can provide multiple outlets for power, but watch out for that current overload on the original feed wire!
The disadvantage is that the connector is a mechanical fit and prone to electrical failure when corroded, which is why many cars start going wrong after five year’s use!
An Extra Fuse Box
If you are accessory mad, the use of a fuse box with a direct link to the solenoid may provide a safe, efficient answer, rather than connecting countless new wires onto an overburdened wire feed.
Again, make sure that the wire, from the feed to the box has sufficient capacity to deal with any load place upon it (an in-line fuse may further protect the entire system).
Is it worth the effort you might ask? Yes! A clean job is a good job!
- If it’s soldered, then the connections will be better, stopping niggling electrical failures and dangerous burn-outs; the connectors are cheaper too.
- The proper connectors often allow easier access for repair of equipment.
- Stops wires from sparking and equipment lasts longer.
- It looks better, too!



altogether? I am talking about the two bolts each side covered by the
dash.
Want to leave a comment or ask the owner a question?
Sign in or register a new account — it's free