The removal of a front fender is quite easy once you know where the fasteners are located.
Remember to bag and tag your items, or you will curse yourself when you go to replace the fender on the car.
Tools you will need:
- 7/16 inch socket
- 1/2 inch socket
- 3/8 inch wrench
- Pozidrive #2 screwdriver (the screws that look like Phillips)
- Pair of Vise grips if screw heads are shot in step 4
Fender Removal instructions:
The photo below was taken during removal of the driver's side (left hand) fender on my 1980 MGB.
- Remove the 8 bolts along the top of the fender in the rain trough, next to the engine compartment.
- Remove the 4 bolts attaching the fender along the grill opening.
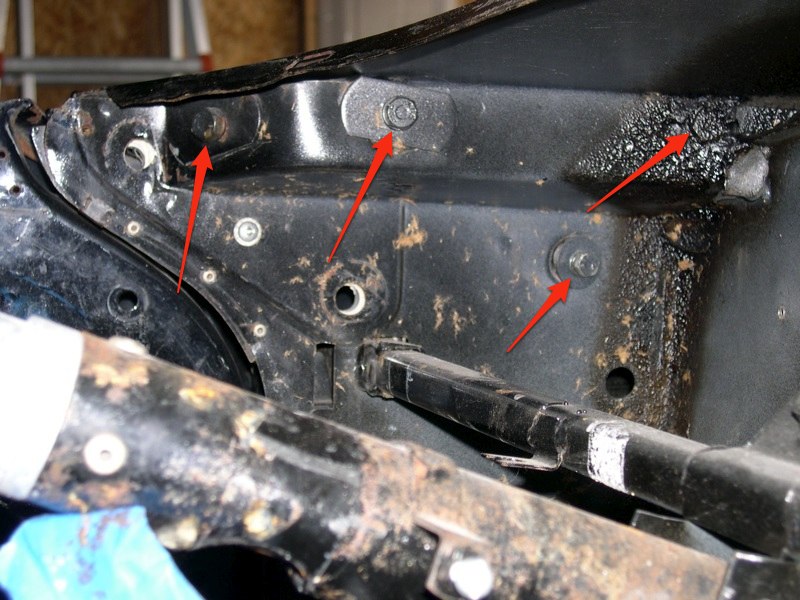
- Remove the 4 bolts attaching the fender that are located up under the cowl along the upper reaches of the cabin interior along the outer wall (see photo below). You will most likely have to dig some seam sealer off the upper right bolt.

MGB Fender bolts to be removed, looking from center of car across steering column in foreground
- Remove the 3 screw nuts that are located on the bottom edge of the fender. You will use the 3/8 wrench along with the Pozidrive screwdriver for this process. They will likely be rusted in place, and need to be twisted or ground off.
- Dig out the seam sealer between the cowl and fender on top, and between the cowl and fender in the rain trough.
- Remove the fender. You shouldn't have to force the fender once all the fasteners and seam sealer are removed, it should come off fairly easy.
Note: Don't lose the spacers between the fender and the cowl as you remove the fender!


Want to leave a comment or ask the owner a question?
Sign in or register a new account — it's free