First, Acquire an impact screwdriver. A cheap set can be had for less than $6 at the usual discount tool stores. The set should include the large Phillips ("crosshead") screwdriver tip you will need. This screwdriver is indexed into the screw head, and then hit on the back with a hammer. The force of the blow holds the screwdriver in the screw head and gives a quick, powerful twist. Be sure you have the screwdriver set on CCW (counter clockwise).
Remove the trim panel off the inside of the door. The screws for the door side of the hinge are behind the trim panel. You may be able to change one hinge while the other is still in place, but I have always removed both at the same time, because I was doing body work on the door. The screws into the body are accessible when the door is opened to the stop.
Do not start removing hinges until you have scribed the hinges, even if one may be okay. Use a steel straight edge and a very fine tipped scribe or X-Acto knife to put a line in the paint above and below the hinge (short scratch, across the interface between the body to hinge and door to hinge, above and below and on the side of the hinge away from the pin.
Scribing the centerline of the screws on the door side will be more inexact, but it will give you a guide on where to start.
Door and Hinge Removal
Fully open the door, and place a floor jack or (large) block under the bottom edge of the door at the back. As soon as you start loosening screws, the door will have a mind of its own. When you get all the screws loose on the door side of hinges, have a helper steady the door. Remove the screws on the door side of the hinge and slide the door away from the body and carefully lay the door assembly on padded blocks (if the paint is in good shape.
Welded on the back of the hinges are studs that extend into the car's bodywork. Your have to remove the "splash guard" access panel in the back of the front wheel well to gain access to the nuts. You will need a long extension or extension and a deep socket to remove them. Don't be surprised to find hidden rust behind this panel, the area is a well known water trap.
Remove the bad hinge(s) from the body, and send them out to be rebuilt or buy new ones. Hinge rebuilders can be found at the Hemmings website.
If you need to do body work, paint the door, or paint around the door, now is the time to complete it.
Door Installation
Door installation is tricky. I buy a small package of door shims (for house doors) at my local building supply. These will be useful for positioning the door in the opening. If you use new hinges, mark them to match the scribes on the original hinge.
Install the hinges on the body and slide the door on to them. Scribe and remove the latch plate assembly at the rear of the opening. Carefully lift/close the door into the opening, using the wood shims to position it. Both the front and back edges need to be moved until the door contour matches the body contour (at the mold line just above the chrome strip).
If the plane of the door and the front fender are not the same, you will need to remove the door, and reposition the body side hinges in and out until this contour is correct... then start on up and down, forward and backward, again
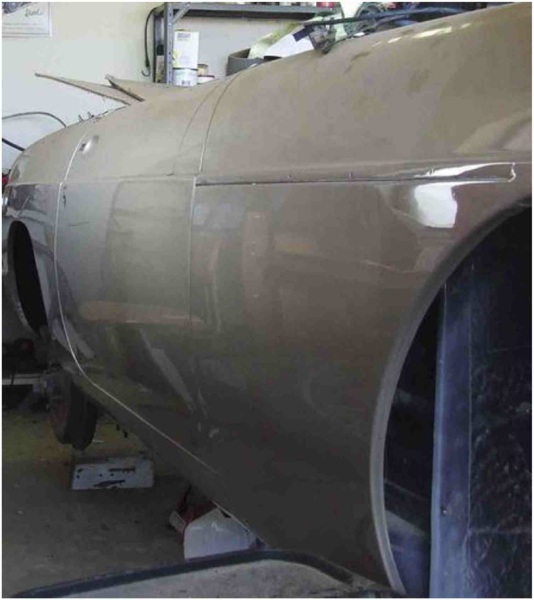
Install the latch plate on the rear door jam, and adjust it until the door barely scrapes it when it closes. Then adjust the in-out location until the plane of the door and the body are the same. The photo includes a little "cheating". I wanted the car to be as straight as possible. After I adjusted the doors (with new door skins), I skim coated the door and body sides and used a long thin air file (sander) to make the line of sight "perfect".
Don't try to complete the hinge and door alignment part of this project in one sitting. Take your time and you'll be happier with the result!


installed. They came right out using a socket version on a 3/8 drive
impact gun.
Want to leave a comment or ask the owner a question?
Sign in or register a new account — it's free