Moss Rear Oil Seal Modification Issues
This article discusses additional procedures, which are ment to compliment the Moss T-Series Oil Seal Kit installation. therefore, it is recommended that they be carried out in conjunction with their instructions.
1. Speedi Sleeve Installation on the Crankshaft Flange
There has been enough discussion out there regarding fitting Speedi Sleeves. So, there is no reason to revisit this item. However, the following information may be beneficial to you. [Ed Note: For more information please visit our T-Series Discussion Forum]
Your crankshaft flange, in all probability, will need micro polishing to ra 10 to 20 micro-inch (.25 to .50 um) specifications. This could result in the flange diameter being less than 4.750"
However, from various technical articles I have read, we have an allowable tolerance shaft size of +/- .004" for this particular oil seal size.
In our particular case .005" was removed during the polishing proceedure. Now since I had both the earlier oil seal and the later oil seal on hand, I tried them on the crankshaft flange. Both seemed tight enough, especially the earlier spring loaded type. Therefore, I am not too sure exactly what difference an additional .001" undersize would actually make to their sealing properties.
If, after crankshaft polishing, the crankshaft flange meets the minum od requirements and is completely free of nicks etc, there should no need to install a Speedi Sleeve.
2. The Oil Seal Not Seating Far Enough Back on the Crankshaft Flange
This can be overcome by having a .100" spacer made and inserted loosely into the base of the oil seal housing. This effectively moves the oil seal rearwards on the crankshaft flange by the same amount. This spacer should be approximately .312" in width as shown.
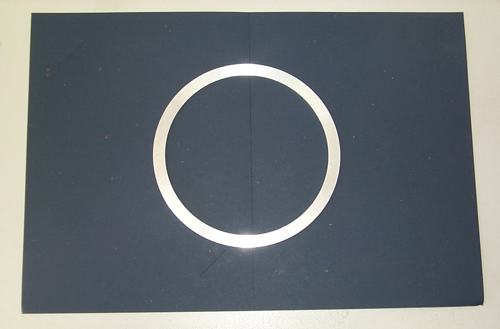
Obviously for this to work, .100" should also be removed from the flywheel flange face. This should still give you sufficient depth for the flywheel to register with the crankshft flange.
Now if you decide to install a .100" spacer within the housing, the oil seal will protrude by the same amount; in which case it will look like this:
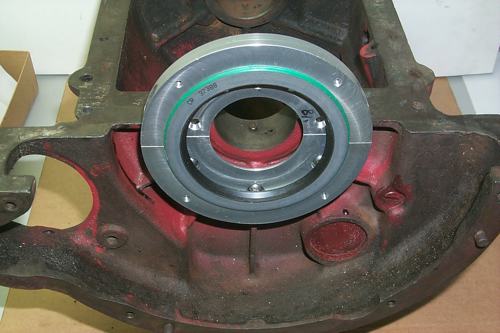
With the appropraite sealer applied to the outside of the oil seal periphery, plus the clamping pressure of the split oil seal housing, this should be sufficient to hold the oil seal firmly in place.
3. A More Accurate Method of Determing the Amount of Material to Be Removed from the Rear Main Cap
Now, unlike the flywheel side of the rear main cap, the inside of the cap is machined matched with the engine block saddle side. Therefore, we use this as a reference point to determine the amount of material to be removed from the main cap.
Remove the original locating pins and install the oil seal housing assembly complete with Moss part 291-900 gasket (dry)
Note: Upon final assembly, we recommend using this 291-900 gasket with a liberal coating of Permatex 80065 high tach gasket spray instead of the Permatex ultra black sealer.
With the oil seal housing secured to the engine block, take a straight edge and clamp it:
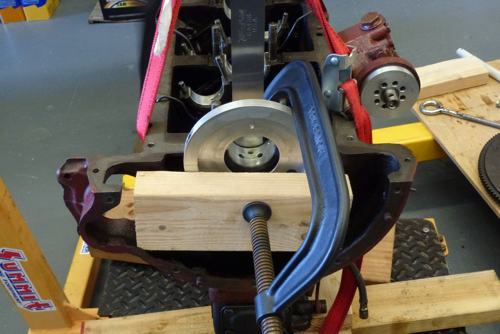
Then make a measurement with a snap gauge as shown below:
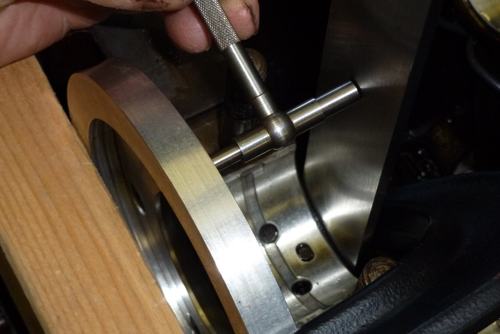
Subtract the recommended .006" to .012" from this measurement and have the main cap machined at right angles to the engine block mounting face.
Note: An alternate method of measuring this gap is to use a dial caliper gauge. Simply measure the depth from the oil seal housing outer face to the straight edge and then subtract the housing tickness from your measurement.
It might worthwhile enlarging the main cap stud mounting holes to 33/64", which will give you "a little bit more wiggle room" to work with.
4. The Inabilty to Center the Oil Seal Housing Relative to the Rear Main Bore
The following describes the issue that we ran into when trying to centralize the original oil seal housing on a recent engine rebuild...
We fitted the crankshaft bearings to the block and the newly machined rear main cap. This was then snugged down into position.
With the two guide pins from the engine block removed, we then attached the complete oil seal housing and, to the naked eye, you could actually see that the housing was not concentric with the main bearing bore.
Undoing the 3 tapered hex socket flat head cap screws (6mm x 1.0mm) and trying to reposition the oil seal housing assembly was unsatisfactory.
By their very design, these screws will always try and self center and, since the countersink in the housing follows the original center of the drilled hole, it is self defeating.
What should have been used was button head cap screws (6mm x 1.0mm) of the same length. These then could have been fitted into a recessed shoulder hole instead of the original cap screws supplied with the kit.
To accommodate this type of screw, the 3 countersunk mounting holes can simply be counter bored. This will provide a flat surface for the button head cap screws shoulder.
This method of attaching the oil seal housing to the engine block will require the use of a centering tool as shown below, in which we show an old engine block being used.
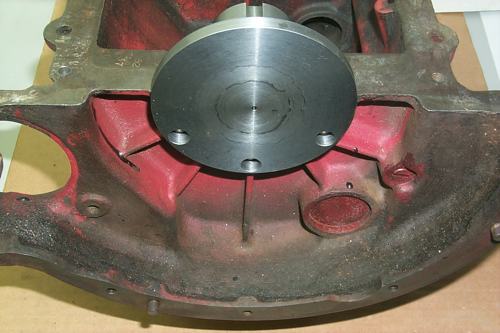
For reference, we use the main cap housing bore diameter measurement of 2.217" (factory specs 2.2177" to 2.2185) in the design. This allows the tool to be used irrespective of the crankshaft main bearing journal size. Also, there is no need to install the main cap when centering the oil seal housing.
Upon assembly, the oil seal housing and centering tool will look like this:
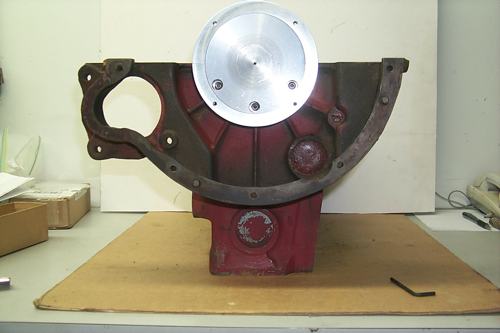
So, my suggestion is that if you are intending to install this type of oil seal kit, this modification is well worth undertaking.
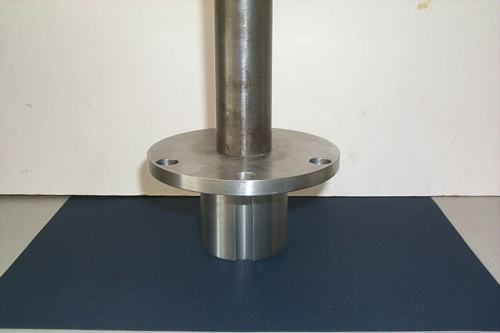
Note: Ignore the 4 additional holes that you see in the oil seal housing face, that’s another modification i had in mind, but i didn't see it as being really necessary. Also, in the photograph below, we show the centering tool modfied with a handle. However, this handle is not necessary to the modification procedure.


No comments have been posted yet...
Want to leave a comment or ask the owner a question?
Sign in or register a new account — it's free