The modern "Delco One-Wire Alternator" is a popular upgrade for the MGB, for its increased output, reliability, price, and availability.
Here's a way to mount it securely and without modification to your MGB engine bay.
Note that these instructions are intended for a negative ground MGB originally fitted with an alternator.
Parts needed:
- Delco "One Wire" Alternator (NAPA rebuilt number 13-4011-SW)
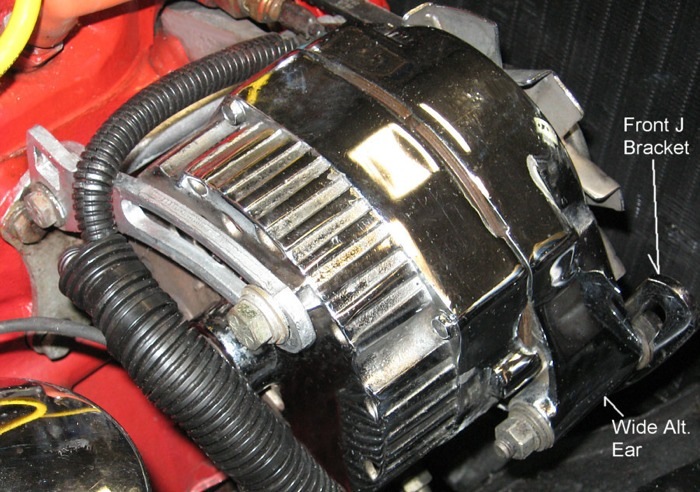
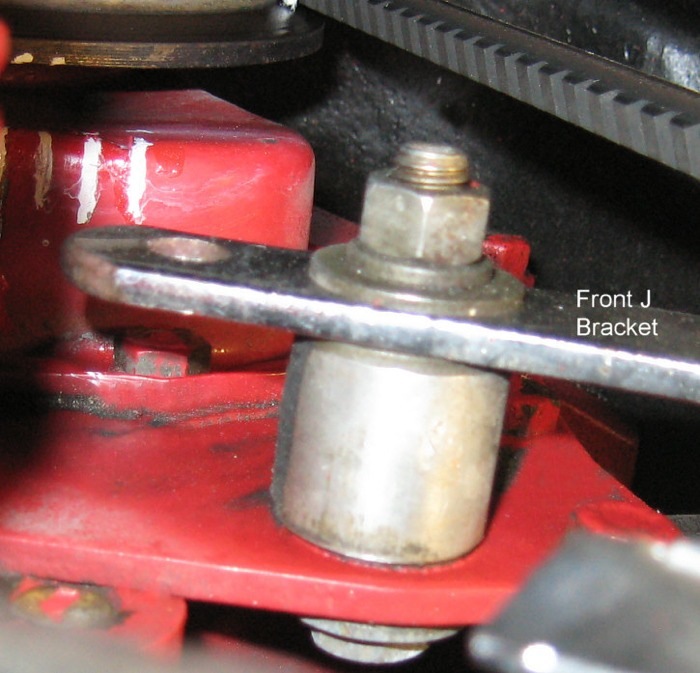
- New "J" bracket longer than stock for main front adjusting. I bought one at a speed shop. It is 11" long measured along the curve. You will have to put another spacer on the mounting bolt to engine to line it up with the alternator.
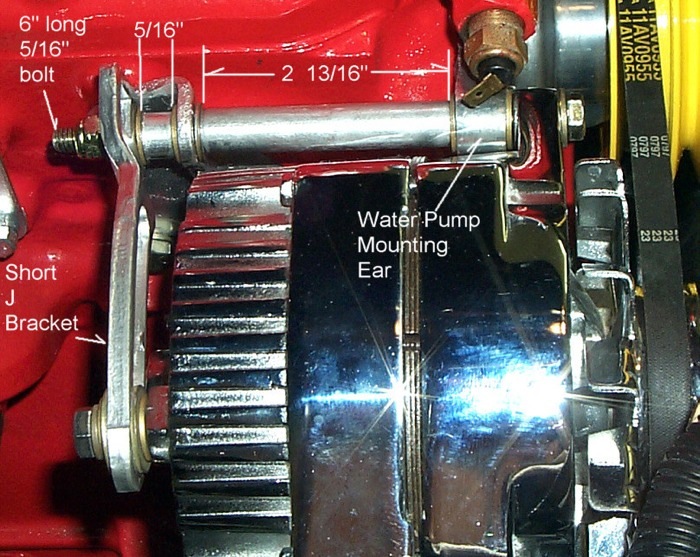
- A used short "J" bracket from a 90s GM car for the rear alternator mount, anything similar to what's in the photo. It bolts to the existing bracket on the engine.
- 6" long 5/16" bolt and bushings cut to size to slip over the bolt. Bushing spacers are 2 13/16" and 5/16" long, but measure your setup first. 5/16" flat washers are used at each end of the spacers and with the bolt head and nut.
- Wrenches and a good light source
See photos for assembly details:

MGB Delco Alternator Mount, used rear GM J-bracket, bolt and spacers installed

MGB Delco Alternator Mount, rear view of front and rear J-brackets

MGB Delco Alternator Mount, front (adjusting) J-bracket, engine mount detail
No modifications are made to the alternator body. You don't want to cut or file the mounting ears at all. This so if you have a failure on a road trip and need to buy a new alternator, you can drop the new one right in place. This mounting method creates mounting points that are balanced. You want this because if your water pump is an alloy pump, the water pump mounting ear can snap off if there is excess strain put on it.
Connecting to the electrical system
My wiring method is simple. The large brown and the smaller brown wire are spliced together (soldered) and connect at the single lug connector at the rear of the alternator. The small brown/yellow wire is capped off and not used. That's it!
Note that you can have the Delco One-Wire Alternator configured to several different amperage outputs at an alternator repair shop, if desired.


Want to leave a comment or ask the owner a question?
Sign in or register a new account — it's free