
"Cliff Notes" To Install A Top
A summary of the steps that Matt demonstrated at an MGCCNWC tech session at Brooklands British Car.
- Read any instructions that the manufacturer might have included first.
- The best time to install a new top is on a warm day to relax the top material.
- Start by lubing the joints of the top frame and making any frame repairs that are necessary.
- Check to make sure that the trap nuts (attachment points on the body shell) are actually there and not stripped. If they are stripped or missing, create a backing plate with new nuts tack welded in place.
- Check the top bows for proper curvature. If they can't be bent back into position, new bows are available from the usual vendors.
- Remove the header bar rubber seal from the track. If the original seal is still good, consider reusing it as the new seals sometimes do not compress at the same rate as the old seal materials.
- Drill the rivets out of the seal channel on the header bar. Consider using a new seal channel bar if yours has been used before due to previous installers oversizing the rivet holes. You will need to have a selection of 1/8" aluminum diameter rivets of various lengths for the installation of the new top. Shorter 1/8" rivets for the middle sections of the header bar where there is only one layer of material being attached and 1/8" x 3/4" for the end sections of the header bar where there are several layers of material being attached.
- One the new top has relaxed, install the old anchor bar that you have removed from the old top, into the new top making sure that you center it into the pocket.
- Once the old anchor bar is installed in the new top, lay to top over the bows and attach the anchor bar and adjacent snaps/Lift-A-Dots along the back edge.
- At this time, it is appropriate to mention that now is a good time to adjust the cars windows alignment. A new top will not necessarily fix leaks, etc. caused by poor window adjustments.
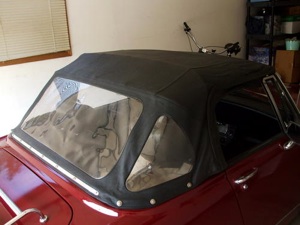
- Once the top is fully attached at the rear of the top and the windows are properly adjusted, pull the material forward to achieve the desired tension and laterally as needed to evenly space the window gaps and the top for both sides. A secret tool for getting the new top to hold in place during the final phases of installation is to use small needle nose Vice-Grips wrapped in tape to prevent marring the top material (see Photo).
- Take a piece of chalk and highlight some reference points on the leading edge of the header bar.
- Mask the windshield to prevent adhesive overspray in the next step.
- The next step involves the use of spray adhesive in a series of short steps.
- Pull the material up from the center of the header bar.
- Spray the center two-thirds of the forward half (the leading edge) of the header bar with adhesive.
- Reposition the fabric so that the chalk marks are repositioned.
- Lift the fabric back off the header bar.
- Spray the wetted section of fabric with adhesive and re-spray the header bar as described above.
- Reposition the fabric back onto the header bar as described above.
- The next sequence of steps involves attaching the channel rail. Using the center rivet hole of the header bar to make a location mark on the leading edge of the top with chalk. This mark will be used to locate the channel rail in the next step.
- In this step you are going to install the first rivet attaching the channel rail to the header bar. Start by pulling the top fabric over the leading edge of the header bar and into position under the channel rail. Use an awl to locate the center channel rail rivet hole through the new top material and into the central header bar rivet hole. Use a 1/8" x 1/8" aluminum rivet to attach the channel rail to the header bar.
- Double check the top to window gaps for both sides to make sure that nothing has shifted.
- Continue the process of pulling the fabric taut under the channel rail for the remaining rivet attachments. Do not attach the outer two or three rivets yet, they will be attached in the next step.
- On the top, there are two tongues at each corner. One generally has finished edges and is the piece that forms the window gasket and is snapped to the windshield pillars. The other is the one that you will be using in this step. Take this tongue, fold it around the corner of the header bar and under the top much like a hospital corner on a bed. Attach the channel rail as described above using the 1/8"X3/4" rivets due to the thickness of two layers of material.
- Install a new rubber seal into the channel rail, or reuse the old one if that seal is still good.
- Install the snaps for the window gasket tongue/windshield pillar connection.
- While these guidelines are for a B, other models will follow the same procedure, but may have other ancillary interior bow straps, etc. to install.
- Stand back and admire your work!
Additional Soft Top Install Notes:
- Follow the manufacturer's instructions for cleaning and folding the top to avoid unnecessary damage.
- Remember that you get what you pay for in tops. The Robbins tops generally have extra material on the leading edge making it easier to attach to the header bar. Robbins tops also generally ship with the window cut out included, which gives you enough material to recover your door caps.
- On insightful tip is to have the overlapping fabric section that are normally glued around the rear bar, is to either install snaps or Velcro strips.
- Use 3M Super strength adhesive, (part #08090), over the General and Trim levels of adhesive.
- When you are installing a new top, remember to not stretch the top too tight as the top will shrink with time.
- Make sure that you use a Pozidriv screwdriver to avoid stripping the screw heads.
- Ever wonder why some of the attachment points on your top are easier to remove, there is a slight difference between the American and English Lift-a-Dot studs. The English studs are slightly larger in diameter and the tops are made with American studs!

")


Want to leave a comment or ask the owner a question?
Sign in or register a new account — it's free