

[Ed. Note- Sorry the images are so small in this article, the original photos were misplaced]
SU Carburettors
The SU carburettor is relatively simple in design but very effective in operation. Often underrated, the SU offers extraordinary versatility. In his book, How To Power Tune MGB 4-Cylinder Engines Peter Burgess points out that. "A correctly set up SU has more ability to specifically alter fuel delivery to suit varying load and throttle positions, than a computer controlled fuel injection system."
SU carburettors work on the constant depression or constant vacuum principle. Inside the body of the carburettor is a piston, which reacts to the air flow into the engine. Attached to the piston is a tapered needle which alters the fuel delivery as it rises and falls. This combination provides variable amounts of fuel and air to cope with the changing demands of the engine.
SUs are simple to adjust, but beware of the temptation to fiddle with them unnecessarily. If your engine is not running correctly, always check your ignition system first of all. Most engine problems are caused by incorrect timing or points out of adjustment. Only when you are completely satisfied that the every component in the ignition system is working correctly, can you turn your attention to the carburettors.
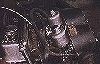
Twin HS4 carburettors with standard air filters.
Checking adjustment
The colour of the sparking plug electrodes and the colour of the exhaust tailpipe provides the most obvious guide as to how well your carburettors are adjusted. Take your MG for a short run and thoroughly warm up the engine, then remove each plug in turn and note the colour of its electrode.
A good quality plug spanner is a worthwhile addition to your tool kit and will enable you to take out the plugs without damaging them or burning your fingers. Too rich a setting will give black sooty deposits on the plug electrodes, a weak setting will give white ashen deposits; while the ideal setting is a pale biscuit colour. When replacing spark plugs take great care not damage the threads in the cylinder head.
Carburettor adjustment procedure
Twin SUs are straightforward to set up, with three main areas of adjustment. These are:
- synchronising the carburettors,
- adjusting the mixture,
- setting the idle speed.
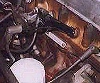
Before attempting to make any of these adjustments, start the engine and run it until it reaches normal operating temperature, then remove the air cleaners.

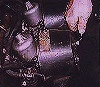
Air cleaners removed.
Air cleaners
Unbolt the four bolts that hold the air cleaners in place. The front mounting bracket holds the choke cable. The rear bracket is not attached to anything, so it can fall in the engine bay when the bolts are withdrawn. With the standard air cleaners removed from the car, renew the air filters. Prise open each air cleaner casing and remove the old air filters. Refit the new filters and reassemble the casing.
Unbolt the air cleaner assembly.

Removing old air filter.
Synchronising twin carburettors
For best possible performance synchronise the operation of both SUs. The linkages between the carburettors are adjustable and you can reset them by slackening off the clamping bolts on both the throttle and jet interconnections.

Undo the throttle clamp bolts.
With the clamping bolts loosened, restart the engine and adjust the throttle idling screws on each carburettor to give the desired idling speed. Set the engine idle speed as low as possible, but keep it fast enough for the engine to run reasonably smoothly.
Set the throttle adjusting screws.

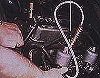
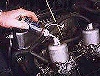
Listening to the intake 'hiss' with a length of plastic tubing.
With the engine running use a length of rubber tube to listen to the intake 'hiss' from each carburettor. Compare the hissing sound made by the air being sucked into each carburettor. You can buy specially made equipment for this comparison check, such as the Carbalancer which shows the level of air intake on a simple meter. It is important to be consistent about where you position the rubber pipe, when you measure the hiss from each carburettor in turn. Measure the hiss until it is the same for each carburettor, and then set the throttle adjusting screws.
Carbalancer gives a visual reading from each air intake.
Adjusting the mixture
If a check of the colour of the spark plug electrodes reveals the need to adjust the mixture, now is the ideal time to do so.
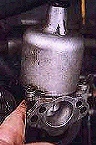
On early MGs, the jet adjusting nut is clearly visible beneath the body of the carburettor. Turning this adjusting nut upwards will weaken the mixture and turning it downwards will make the mixture richer. You can obtain an SU jet adjusting spanner to make this adjustment easier.

Adjusting the mixture on an HS4 carburettor.

On an HIF carburettor the mixture adjustment is by a cross head screw,
situated in a recess in the base of the body.
On later cars, jet adjustment is controlled by turning a screw on the side of the body of the instrument. Turning the screw clockwise will enrich the mixture, while turning the screw in an anti-clockwise direction will weaken the mixture.
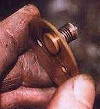
Carburettor lifting pins
At the side of each carburettor is a lifting pin, these pins enable you to adjust the mixture and check the movement of the piston. First check that each carburettor piston is rising and falling correctly. Press the pin up to lift the piston and then check that the piston falls freely by listening for a discernible click as it comes down on the bridge. If the piston moves only very slowly and you cannot hear a click, then the jet needs to be correctly centred.
Lifting the pin at the side of the carburettor to raise the piston.
Once the carburettors have been synchronised, the lifting pins can be used to check the mixture adjustment. Raise the lifting pin on the front carburettor to lift the piston by 1/32 in (0.8mm).
- If the engine speed increases, the mixture strength of the front carburettor is too rich.
- If the engine speed immediately decreases, the mixture strength of the front carburettor is too weak.
- If the engine speed momentarily increases very slightly, the mixture strength at the front carburettor is correct.
Repeat this operation for the rear carburettor, and after adjustment re-check the front carburettor, since both are interdependent.
When the mixture is correct the exhaust note will be regular and even. If it is irregular with a splashy type of misfire and colourless exhaust, the mixture is too weak. If there is a regular or rhythmical type of misfire in the exhaust beat, together with a blackish exhaust, then the mixture is too rich.
Carburettor tuning equipment
A popular device for setting the mixture is to use a Colortune. This consists of sparking plug with a transparent top which enables you to see the colour of the combustion taking place. You can the set the mixture by observing the colour changing in the plug. It is best to do this in a shaded area, although the Colortune comes with a viewing tube.
The Colortune plug provides a visual guide to combustion.
There is also the Gastester which provides a measure of the carbon monoxide or CO level in the exhaust. CO is a by-product of the combustion process and there is a known relationship between the amount of CO present in the exhaust gas and the air/fuel ratio. The Gastester provides a measure of CO levels and enables you to adjust the mixture to conform to MoT specification.
Reset idle speed
Usually as a consequence of making adjustments to the intake and the mixture, the idle speed will have increased and it will be necessary to readjust the throttle adjusting screws. You will find a recommended setting for the idle speed in the data specification of your workshop manual. As an approximate guide, the idle speed can be set at the point at which the ignition light is just beginning to glow.
Throttle interconnection clamp bolts
Finally set the throttle interconnection clamping levers so that the link pin is 0.12 in (0.30mm) away from the lower edge of the fork. Tighten up the clamp bolts.
Jet interconnection clamp bolts
With both the jet levers at their lowest position, set the clamp bolts so that both jets will begin to move simultaneously. The choke cable is fitted to a bracket that is connected to the air cleaner bolts, it will be necessary to refit this bracket with a suitable shorter bolt, so that you can carry out the following adjustment with the air cleaners removed. Connect the choke control so that there is approximately 1/16 in (1.6mm) free movement before it starts to pull the jet levers. Then pull out the choke control until it is just about to move the carburettor jets. Adjust the fast idle screws by comparing the intensity of the intake hiss to give an engine speed of about 1000 rpm when hot.
Finally, refit air cleaners.
Damper oil
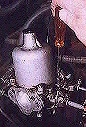
Top up each of the piston dampers with carburettor damper oil. Unscrew the damper cap, withdraw the damper and top up the reservoir until the oil level is 1/2 in (12mm) above the top of the hollow piston rod.
Topping up the dashpots with damper oil.
Pancake air cleaners
Many owners fit pancake air cleaners which improve performance if used in conjunction with richer carburettor needles. Richer needles become necessary because the reduced resistance of the slimmer air filter will weakens the mixture.
Pancake air filters usually have foam filters which can be cleaned with petrol, while K&N air filters have special cotton elements which are pre-oiled and require cleaning and re-oiling at only 100,000 mile intervals depending on conditions.
Float chambers
The float chamber of the carburettor contains a float and a needle valve. The float works rather like a ball valve in a water cistern. As the level of fuel in the float chamber falls, the needle opens and allows in more fuel. If the float sticks or becomes punctured, fuel will continue to enter the chamber and eventually pour out of the overflow pipe. Sometimes the needle valve itself can stick or become blocked and either not allow in any fuel or fail to shut off and fuel will overflow. On early cars the float chambers are mounted at the side of the carburettors but on later cars the float chambers are built-in to bottom of the main body.
Butterfly valves
Rubber bumper MGs have carburettors fitted with overrun depression limiting valves fitted to the butterfly or throttle disc. The idea behind these valves was to clean up exhaust emissions by drawing in more air on the overrun. If the springs become weak and the valves fail to close properly an erratic tickover with a rising idle speed will result. This can be remedied by replacing the valves with new ones or by reverting the earlier specification butterflies without the overrun depression valves.
A butterfly or throttle disc fitted with an overrun depression valve.

Original throttle disc.
Carburetor Problems
Running your MG with the carburettors incorrectly adjusted can cause major problems. If the mixture is set too rich the engine will suffer from a high build up of carbon in the combustion chambers and on the piston crowns, and the performance of the sparking plugs will be impaired. Excess fuel in the mixture will also contaminate the engine oil. The protective function of the oil will be reduced and this will cause premature cylinder bore wear. The thin film of lubricating oil between the bore and the piston gets washed off causing cylinder bore glazing.
If the mixture is set too lean or too weak the engine will overheat and this may cause damage to the valves and the tops of the pistons. Ignition problems and poor running will also be a consequence of having insufficient fuel in the mixture.
If you suspect that your carburettors are out of tune and you do not wish to tackle the job yourself, it is vital to have them professionally adjusted. This will ensure that you get the best possible performance and economy from your engine while preventing any unnecessary wear or damage.
- Richard Ladds
This article first appeared in Enjoying MG Magazine

")


Want to leave a comment or ask the owner a question?
Sign in or register a new account — it's free