
MG Midget Forum
Winter project - Dashboard restored
Posted by jimmyb1906


jimmyb1906
Jim Blower
|
Topic Creator (OP)
Apr 30, 2017 08:02 PM
Joined 8 years ago
21 Posts
|
I decided to restore my dash this winter due to a few things that were bothering me -
1- Dash being high gloss body color
2 - Tach not holding a steady rpm
3 - Indicator lights being bare bulbs
4 - Indicators not self canceling
5 - Heater cable seized
6 - Overspray paint on every piece of chrome trim
7 - Wires hanging down from a previously removed non working radio
Here's how it how it all came together
Step 1 - Remove the dash from the car. (Found out the hard way it's easier to remove the complement steering column first!)

|
jimmyb1906
Jim Blower
|
Topic Creator (OP)
Apr 30, 2017 08:21 PM
Joined 8 years ago
21 Posts
|
1 - Dash being high gloss body color
There is not really a picture I can share with you on this one without revealing the finished project as I did not take any pictures before rebuilding it.
I researched the wrinkle finish paint and decided I did not have the equipment to get a satisfactory finish that I wanted. I ended up having it powder coated, the shop that did the project told me that it has 4/5 layers of paint, various shades of red on top of the original black.
I was excited to get it rebuild when I got it back it looked so good.
|
S1 Elan
Kurt. Appley
|
May 1, 2017 07:23 AM
Top Contributor
Joined 11 years ago
8,014 Posts
|

nonracer
Steve Codianni
|
May 1, 2017 10:38 AM
Joined 12 years ago
2,583 Posts
|
|
jimmyb1906
Jim Blower
|
Topic Creator (OP)
May 1, 2017 09:44 PM
Joined 8 years ago
21 Posts
|
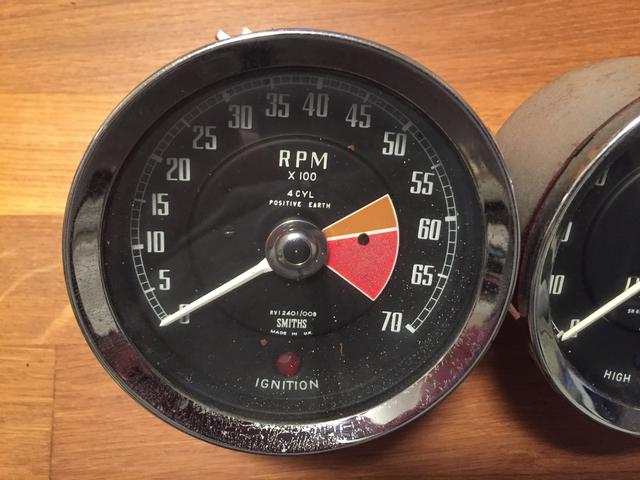
2. Tach not holding steady RPM
The tach bounced 3,000 rpm at all engine speeds. After removing It from the dash and disassembling it, I found a lot of the electronic components were cracked and crumbling. I had no idea how to repair these electronic parts, but with a lot of reading, mostly from this forum, I found Tom Hayden. A quick email to Tom assured me that these are easily repairable. Tom sold me all the parts for $10.00 along with very detailed instructions on what to change for what.
Luckily I was taught to solder by my father as a kid. A steady hand and careful planning, I was able to swap out all the electronic components, clean all the internals as well repaint the case inside and out.
Reassembled, and mounted back into the dash.
Attachments:
image.jpeg 45.9 KB
|
May 1, 2017 10:51 PM
Joined 7 years ago
638 Posts
|
|
 |
May 2, 2017 02:19 AM
Joined 9 years ago
354 Posts
|
In reply to # 3502049 by jimmyb1906
2. Tach not holding steady RPM
The tach bounced 3,000 rpm at all engine speeds. After removing It from the dash and disassembling it, I found a lot of the electronic components were cracked and crumbling. I had no idea how to repair these electronic parts, but with a lot of reading, mostly from this forum, I found Tom Hayden. A quick email to Tom assured me that these are easily repairable. Tom sold me all the parts for $10.00 along with very detailed instructions on what to change for what.
Luckily I was taught to solder by my father as a kid. A steady hand and careful planning, I was able to swap out all the electronic components, clean all the internals as well repaint the case inside and out.
Reassembled, and mounted back into the dash.
The tach bounced 3,000 rpm at all engine speeds. After removing It from the dash and disassembling it, I found a lot of the electronic components were cracked and crumbling. I had no idea how to repair these electronic parts, but with a lot of reading, mostly from this forum, I found Tom Hayden. A quick email to Tom assured me that these are easily repairable. Tom sold me all the parts for $10.00 along with very detailed instructions on what to change for what.
Luckily I was taught to solder by my father as a kid. A steady hand and careful planning, I was able to swap out all the electronic components, clean all the internals as well repaint the case inside and out.
Reassembled, and mounted back into the dash.
Hey, thats a great info!
Can you PM me Tom´s email address? I´d like to have the parts too. Seems like my tach needs a service sometime in the near future too....
Cheers,
Wolf
|
May 2, 2017 10:23 AM
Joined 7 years ago
638 Posts
|
|
|
jimmyb1906
Jim Blower
|
Topic Creator (OP)
May 2, 2017 11:54 AM
Joined 8 years ago
21 Posts
|
In reply to # 3502413 by Mojan
Maybe you can copy Toms instruction here
If you type Tom Hayden into the search function at the top of the page and filer by members you will find him including contact info. The instructions are very detailed with pictures, a little too much to copy and past here.
Alternatively you can pm me with your email and I will pass them along to you
|
May 2, 2017 04:37 PM
Joined 7 years ago
55 Posts
|
|
|
jimmyb1906
Jim Blower
|
Topic Creator (OP)
May 3, 2017 08:28 AM
Joined 8 years ago
21 Posts
|
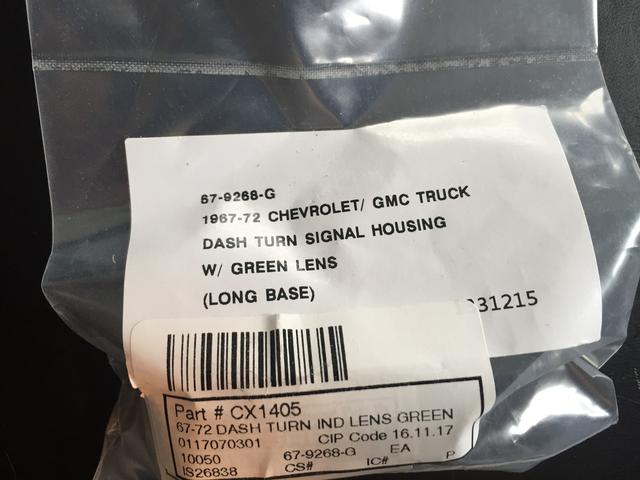
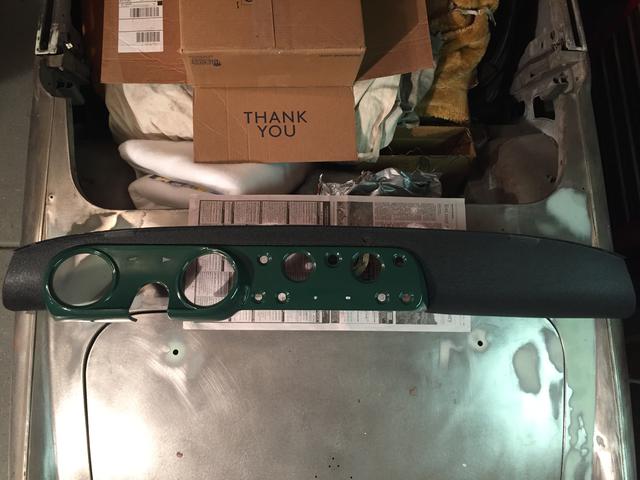
3. Indicator lamps being bare bulbs
This was one of the things that really annoyed me while driving. These little indicator lights are cut outs in the dash with bulbs behind them, when the green lens is missing you look right at the little bulb.
I looked everywhere for these green lenses without any luck, again searching this forum I found someone that had found a solution. GMC/Chevy truck dash turn signal housing with green lens part# CX1405
These parts work really well, just need to cut down the cardboard tube to size and bend the holding prongs on the bracket in a little to hold them.
I am pleased with how they turned out.
Attachments:
image.jpeg 36.7 KB
|
jimmyb1906
Jim Blower
|
Topic Creator (OP)
May 3, 2017 09:10 AM
Joined 8 years ago
21 Posts
|
4 - Indicators not self canceling
I did not take any picture of the indicator stalk as I took it off the column. After looking at it I saw that the little cams and springs had fallen of. I cleaned up all the parts, attached them back where they were supposed to be and refitted the stalk.
All working great again
I did not take any picture of the indicator stalk as I took it off the column. After looking at it I saw that the little cams and springs had fallen of. I cleaned up all the parts, attached them back where they were supposed to be and refitted the stalk.
All working great again
 Peoria, AZ, USA
Sign in to contact
|
May 3, 2017 07:59 PM
Top Contributor
Joined 8 years ago
790 Posts
|
In reply to # 3501443 by S1 Elan
The after market wrinkle paint actually works quite well. But then it holds dirt so you are probably not out anything by going your route.
Kurt.
Kurt.
I just refinished my dash and radio cabinet with Rustoleum's wrinkle finish paint and it turned out exceptionally well IMO. I like the body color so I did something a little different.
Steve
President, Arizona MG Club (http://www.azmgclub.org)
My Blogs: https://midget.strublic.net, https://mgb.strublic.net, https://alfa.strublic.net
Attachments:
Photo Mar 26, 7 12 04 PM.jpg 39.3 KB
about 3 months and 4 weeks later...
|
jimmyb1906
Jim Blower
|
Topic Creator (OP)
Aug 31, 2017 07:24 PM
Joined 8 years ago
21 Posts
|
Sorry for the delay in finishing this post, I had computer issues then summer was here!
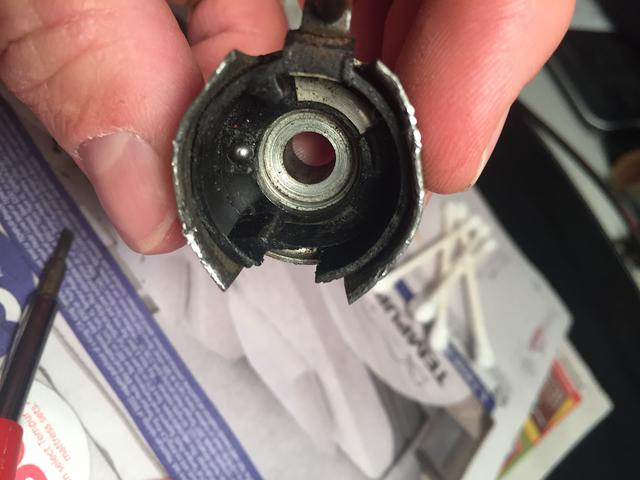
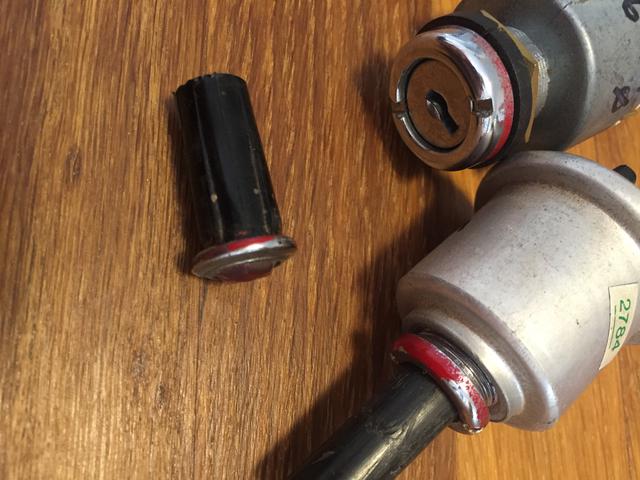
5 - Heater cable seized
No pictures of un seizing the actual cable, I just hung it from my bench and squirted WD40 into it every day as I got into my car for work and tried to move it. Over time it moved a little, then a little more until it was totally free.
The other issue was one of the wire connectors was loose, after inspection the plastic that makes up the switch part has crumbled and fallen apart. after some careful bending and prying I was able to take the switch apart and built it all back up again with epoxy then carefully put it all back together again. Quick test with a multimeter and it's all up and running again.
Attachments:
IMG_0549.JPG 35.6 KB
|
jimmyb1906
Jim Blower
|
Topic Creator (OP)
Aug 31, 2017 07:28 PM
Joined 8 years ago
21 Posts
|
Forums 
Having trouble posting or changing forum settings?
Read the Forum Help (FAQ) or contact the webmaster
