
MGB & GT Forum
MGB Rubber Bumper badge Bar installation photos
Posted by Chicago Ray


Chicago Ray
Raymond Kunst
|
Topic Creator (OP)
Aug 30, 2016 03:52 PM
Joined 17 years ago
908 Posts
|
Hello all, I have a badge bar that I bought many many years ago from Moss Motors.
I have been asking all over the web, and for many years on this forum and still have not received an answer.
Does anyone know how to install this bar?
I need detailed photos, I have tried every way possible and cannot get it to fit.
The obvious way does not work.
Here are some photos from the web, the photo that you see with the bar in position is NOT CORRECT.
Once a year I try for the answer, and here I am again.
* The problem is that the bar is too short to reach the existing holes on the car.
* NO I WON’T DRILL ANY HOLES
Raymond Kunst
3950 N. Lake Shore Drive
Apt. 1200A
Chicago, IL 60613
Email: chicagoray.rk@gmail.com
Art Photography: raymond-kunst.fineartamerica.com
Facebook Art Photography Page: www.facebook.com/RaymondKunstPhotography
LinkedIn: www.linkedin.com/in/RaymondKunst
Edited 3 time(s). Last edit at 2016-08-30 03:57 PM by Chicago Ray.
Attachments:
MGB Badge Bar_150dpi.jpg 23.5 KB
 |
Aug 30, 2016 05:57 PM
Top Contributor
Joined 18 years ago
14,050 Posts
|
I'll bet it was designed so that you have to drill mounting holes into the panel above the oil cooler. It obviously doesn't attached to the slam panel like in the last pic. You're probably supposed position it in place, position the arms onto that panel and drill holes as needed. I don't see any other option since there don't appear to be any other holes, bolts or captive nuts in a location that would work.
I've never really liked the RB badge bars anyway. They just don't work will with the more modern nose of the RB cars. That's why I mounted my club's badge in the rear...off the license plate light mounting bolts.
I've never really liked the RB badge bars anyway. They just don't work will with the more modern nose of the RB cars. That's why I mounted my club's badge in the rear...off the license plate light mounting bolts.
Attachments:
Apr2016.JPG 30 KB
|
Chicago Ray
Raymond Kunst
|
Topic Creator (OP)
Aug 30, 2016 06:14 PM
Joined 17 years ago
908 Posts
|
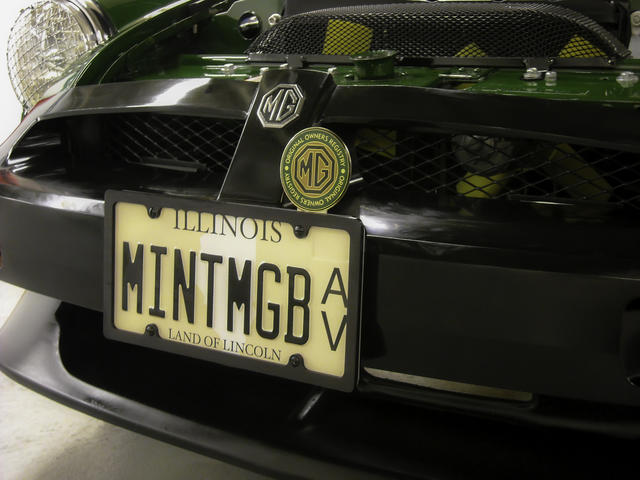
Thanks Joe, I have my club badge mounted onto my front license plate.
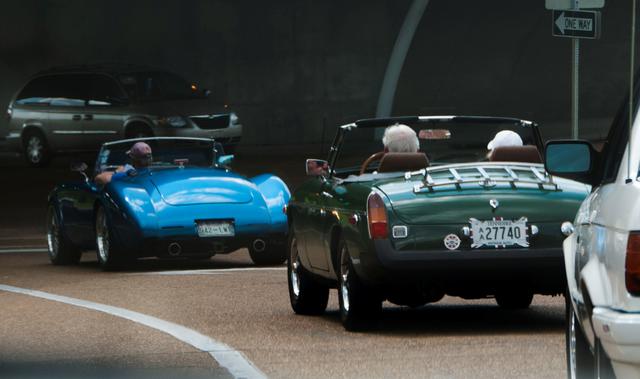
I originally bought the badge bar so that I can add a pair of Fog/Driving lights, like the GT in the photos below.
Raymond Kunst
3950 N. Lake Shore Drive
Apt. 1200A
Chicago, IL 60613
Email: chicagoray.rk@gmail.com
Art Photography: raymond-kunst.fineartamerica.com
Facebook Art Photography Page: www.facebook.com/RaymondKunstPhotography
LinkedIn: www.linkedin.com/in/RaymondKunst
Attachments:
DSCN1517_MGB license plate MINT Original_300dpi.jpg 46.1 KB
DSCN1489_3906x3044_MGB Plate Original Owners Club_300dpi.jpg 49.5 KB
|
|
Aug 30, 2016 06:54 PM
Top Contributor
Joined 18 years ago
14,050 Posts
|
I forgot that you have a front license plate. I think it's been about 30 years or so since we've had them in TN...
I don't blame you for not wanting to drill any holes in your car! On the RB cars with driving/fog lamps, I like rectangular ones under the bumper anyway - although they are probably more vulnerable. To me, those mounted like those on that GT put too much hardware up too high. The lights sticking up above the front of the bonnet look like rally car lights, which are fine.....on a rally car. Plus, the chrome bar and hardware in front of the black bumper just looks tacked on (which, of course, it is!) and doesn't compliment the design of the car. It might help if the bar and hardware were painted black to match the bumper. Smaller rectangular lights might look better as well.
If I were going to use them, I'd seriously consider recessing a pair of rectangular lamps into the center of the front bumper...but that requires a bit more surgery than just drilling a couple of holes!
 Cambridge, ON, Canada
Sign in to contact
|
Aug 30, 2016 10:53 PM
Top Contributor
Joined 18 years ago
4,740 Posts
|
I have installed mesh to the back of the back of the bumper openings and then installed badges with long screws and a backing plate. Driving lights are mounted under the bumper. The look seems more appropriate to a rubber bumper car.
Attachments:
P9030282.JPG 60.8 KB
 |
Aug 31, 2016 12:22 AM
Joined 12 years ago
1,540 Posts
|
Hi Raymond, I'm sure you've already tried these 2 holes, but it sure looks to me like it would fit from your photo and the others of the badge bar installed.
Cheers,
Jeff
Or is this the "obvious" location that doesn't work?
1974 MGB GT, 18V+.030, Richard Longman head, OD, HIF4's, rebuilt 25D w/points, ALTIMAX RT43-185/70's on Minotaurs.
Some days I wish I could go back in life. Not to change anything, just to feel a few things twice.
Edited 1 time(s). Last edit at 2016-08-31 12:26 AM by jramstad.
Attachments:
Rubber-bumpered MGB Badge Bar.jpg 55.9 KB
 |
Aug 31, 2016 12:36 AM
Joined 8 years ago
1,099 Posts
|
In reply to # 3344455 by jramstad
Hi Raymond, I'm sure you've already tried these 2 holes, but it sure looks to me like it would fit from your photo and the others of the badge bar installed.
Cheers,
Jeff
Or is this the "obvious" location that doesn't work?
Cheers,
Jeff
Or is this the "obvious" location that doesn't work?
X2 - this is what I thought too from your original photo. Seems like moving the bar up the front of the rubber grill then would give you the clearance needed to attach to pre-existing holes ('considering the photos you shared show the bar at least halfway up the grill and the photo showing it not reaching shows the bar at the bottom). I could very well be wrong as I have not attempted the install you are posting.
Best of luck!
"Make no little plans; they have no magic to stir men's blood"
Daniel H. Burnham, Architect
1976 MGB - pretty much stock but with a few sundry deviations
|
Chicago Ray
Raymond Kunst
|
Topic Creator (OP)
Aug 31, 2016 12:46 AM
Joined 17 years ago
908 Posts
|
Thanks Jeff, that is the “obvious” location that doesn't work?
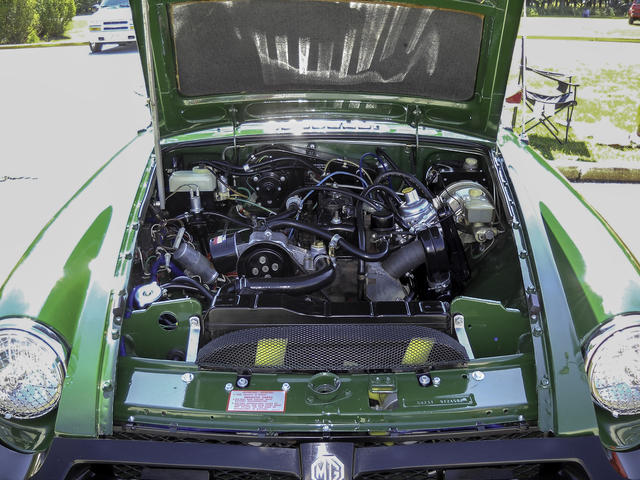
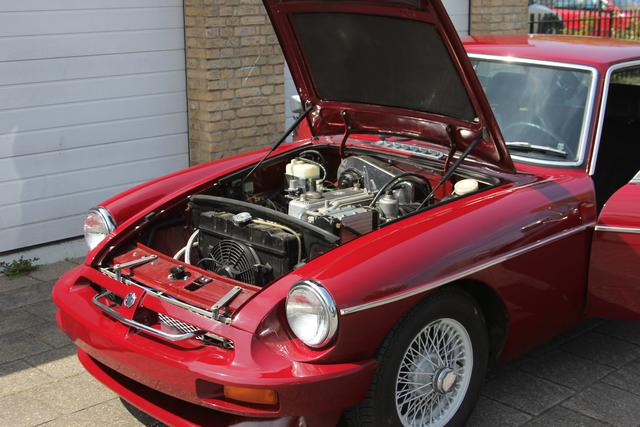
I think that it somehow attaches behind the bumper, I know for sure that it does not attach to the Bonnet Lock Platform.
The brackets are way too short and do not lie flat on the Bonnet Lock Platform, there is a 1/2” gap that is created when you place them there.
I also tried to attach the brackets to the underside of the Bonnet Lock Platform, no go.
Raymond Kunst
3950 N. Lake Shore Drive
Apt. 1200A
Chicago, IL 60613
Email: chicagoray.rk@gmail.com
Art Photography: raymond-kunst.fineartamerica.com
Facebook Art Photography Page: www.facebook.com/RaymondKunstPhotography
LinkedIn: www.linkedin.com/in/RaymondKunst
Attachments:
DSCN1990_MGB Engine at BCF.jpg 74.8 KB
 |
Aug 31, 2016 12:59 AM
Top Contributor
Joined 10 years ago
1,669 Posts
|
I purchased this 1974 1/2 GT from the US in the fall of 2014, it had the badge bar mounted.
Had the idea to remove it but in the middle it had touched the middle of the painted bumper and damaged the paint,
so removing it would leave a black rubbing spot because the paint was of.
So finally I sold the car (condition of body, engine gearbox. o/drive was a bit less as I expected) for those with good eyes, yes it had a supercharger.
Attachments:
IMG_8751 (Copy).JPG 48.7 KB
|
|
Aug 31, 2016 01:07 AM
Joined 8 years ago
1,099 Posts
|
In reply to # 3344464 by Rob-USLE
I purchased this 1974 1/2 GT from the US in the fall of 2014, it had the badge bar mounted.
Had the idea to remove it but in the middle it had touched the middle of the painted bumper and damaged the paint,
so removing it would leave a black rubbing spot because the paint was of.
So finally I sold the car (condition of body, engine gearbox. o/drive was a bit less as I expected) for those with good eyes, yes it had a supercharger.
Had the idea to remove it but in the middle it had touched the middle of the painted bumper and damaged the paint,
so removing it would leave a black rubbing spot because the paint was of.
So finally I sold the car (condition of body, engine gearbox. o/drive was a bit less as I expected) for those with good eyes, yes it had a supercharger.
Sharp car

Steve
"Make no little plans; they have no magic to stir men's blood"
Daniel H. Burnham, Architect
1976 MGB - pretty much stock but with a few sundry deviations
|
Chicago Ray
Raymond Kunst
|
Topic Creator (OP)
Aug 31, 2016 01:07 AM
Joined 17 years ago
908 Posts
|
Rob exactly, you can see in your photo that it does not attach that way.
Besides looking horrible the bar presses up against the bumper and damages the finish.
You can also see the 1/2” gap underneath the bracket.
There must be another solution, I can’t believe that it was designed to fit that way.
Raymond Kunst
3950 N. Lake Shore Drive
Apt. 1200A
Chicago, IL 60613
Email: chicagoray.rk@gmail.com
Art Photography: raymond-kunst.fineartamerica.com
Facebook Art Photography Page: www.facebook.com/RaymondKunstPhotography
LinkedIn: www.linkedin.com/in/RaymondKunst
Edited 2 time(s). Last edit at 2016-08-31 01:10 AM by Chicago Ray.

trmgb
todd martinez
|
Aug 31, 2016 01:18 AM
Joined 13 years ago
2,545 Posts
|
|
calsunshine
Paul R
|
Aug 31, 2016 01:55 AM
Top Contributor
Joined 13 years ago
1,077 Posts
|
The badge bar uses the center of the bumper to provide support. What you see in the picture from Rob is the correct and yes ugly installation. There is another badge bar on the market that is very similar but it has a center mounting bolt and spacer tube that brings the bar forward about half an inch, and I can assure you that you do not want that one as it requires drilling a hole in the bumper and threading a self tapping screw through the bumper into the badge bar.
|
Chicago Ray
Raymond Kunst
|
Topic Creator (OP)
Aug 31, 2016 06:41 AM
Joined 17 years ago
908 Posts
|
In reply to # 3344475 by calsunshine
The badge bar uses the center of the bumper to provide support. What you see in the picture from Rob is the correct and yes ugly installation.
Thanks Paul, if that is truly how the badge bar is mounted then that is horrible, the design department should be ashamed of themselves.
They could have put a little bend in the bracket and added an 1/2” so that it would fit flush with the slam panel.
I bought the badge bar years ago, I am sure that I am not the only person who complained about the fit, Moss should’ve upgraded the bracket by now?
Well, if there is anyone interested in a badge bar and lives near Crystal Lake, Illinois, I have two for sale.
I complained about the fit when I bought the first badge bar and they sent me another one thinking that the first one had a defect.
Bummed in Chicago.
Raymond Kunst
3950 N. Lake Shore Drive
Apt. 1200A
Chicago, IL 60613
Email: chicagoray.rk@gmail.com
Art Photography: raymond-kunst.fineartamerica.com
Facebook Art Photography Page: www.facebook.com/RaymondKunstPhotography
LinkedIn: www.linkedin.com/in/RaymondKunst
 |
Aug 31, 2016 07:12 AM
Top Contributor
Joined 14 years ago
3,724 Posts
|
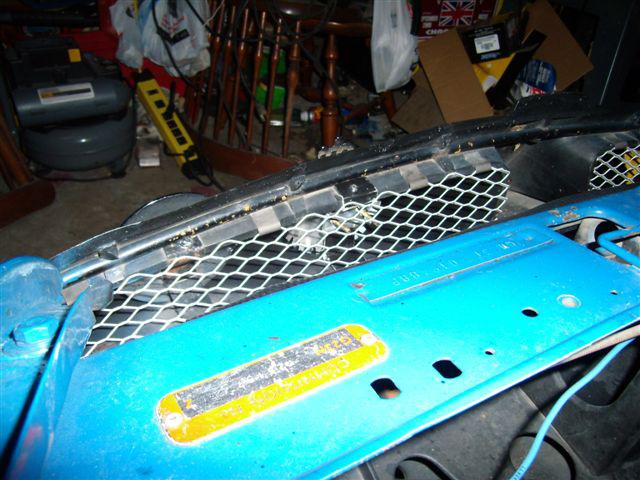
If you look at the pics of installed bars, you can see that the bar curves downward as it goes toward the mesh grille. Your last pic shows the bar upside down. Flip it and you will need to drill 2 holes in the splash panel as Joe Reed says.
USMC 1967 - Always ... Semper Fi
79 RB Lowered, HS4s by Dave Braun & "Schlemmerized" 25D Dizzy, 9.5:1 CR, Mild Performance Cam, 18V with OD Tranny.
78 Midget MK IV Pagent Blue
73 GT in Black Tulip.. Engine by Hap Waldrop, OD Transmission by Dick Moritz Distributor is "Schlemmerized"
72 Midget MKIII Red
Forums 
Having trouble posting or changing forum settings?
Read the Forum Help (FAQ) or contact the webmaster
