
MGB & GT Forum
I can't go yet, but now I can stop
Posted by Steve Lyle


 |
Topic Creator (OP)
Apr 16, 2014 10:23 PM
Joined 16 years ago
3,155 Posts
|
The brakes have been installed for awhile now, but I hadn't got around to bleeding them.
I tried last night. I have a Motive power bleeder, and tried to make my own MC cap with a hose barb and an old MC lid and some silicon sealant. It started leaking at 2 psi, so I guess I'll have to look at getting Motive's cap, for what, $30?
Anyway, the Mrs. was available tonight, so we did it the old fashioned way, so to speak.
Started with the rears. Must have gone through 100 up/downs, with no fluid at the left rear. So we went after the fronts, they bled fine. Back to the rears, another 30 or so, no joy.
So I removed the rear line at the pressure differential thingy, and at the flex hose, and blew air through the line. No problem. Then with the line still off, had the Mrs. give a few very slow pumps, with some rags under the differential. Finally something 'blew' at the MC, and fluid started to flow. Very odd, and I don't understand it, but I hooked everything back up, and we bled away. Probably needs another session, but I'm 95+% there, I think.
Now on to the engine, to get some 'go' for my 'whoa'.
Documenting my project in my journal at https://www.mgexp.com/home#journal
 |
Apr 16, 2014 10:42 PM
Joined 10 years ago
13,234 Posts
|
Steve,
Glad you finished the process... Or at least 95% of it! You didn't mention "bench" or "pre-bleeding" the master cylinder. Don't know if it was new (or completely empty) but if so, a good "bench bleeding" makes for a much easier experience... I really enjoy your posts. I'm a few months behind you with my 72GT. ENJOY!!!!!!
Paul
Those who confuse Burro and Burrow don't know their @ss from a hole in the ground...
|
|
Topic Creator (OP)
Apr 16, 2014 10:46 PM
Joined 16 years ago
3,155 Posts
|
New brake system, the only holdover parts are the brake lines. They look dingy but they're solid.
No, I didn't bench bleed. Never done it, didn't want to risk it, kept hearing from people who installed MC's without doing it. You're probably right, would have gone smoother if I had. But I thought I'd be able to use the Motive, and it would force the fluid where it needed to go.
And the Lockheed adapter for the Motive is close to $40. Ouch. Might have to think about that one...
Documenting my project in my journal at https://www.mgexp.com/home#journal
 |
Apr 16, 2014 10:50 PM
Joined 10 years ago
1,071 Posts
|
HAH I had a similar problem when I did my brakes on the 71. I too had to undo the hose and see why no fluid was coming out. After some trial and error I found that brake line had ben Mashed so badly that no fluid could floe through it. I dunno what the DPO did but Dang.

underdog
Jim Underwood
Pittsburgh, USA
Sign in to contact
1972 MG MGB
1980 Triumph TR8 "Fabulous Trashwagon" 1999 Chevrolet Corvette "Darth Vader" 1999 Chevrolet S10 "Spare Change" & more |
Apr 17, 2014 07:46 AM
Joined 16 years ago
10,355 Posts
|
|
|
Apr 17, 2014 08:10 AM
Joined 10 years ago
13,234 Posts
|
Aww... Com'on Jim, you know there is more than one way to stop an MG! Brakes are primary but a good strong tree (or telephone pole) will also stop the car in a pinch... 
Those who confuse Burro and Burrow don't know their @ss from a hole in the ground...
Those who confuse Burro and Burrow don't know their @ss from a hole in the ground...
 |
Apr 18, 2014 08:17 AM
Top Contributor
Joined 13 years ago
3,768 Posts
|
Steve, be sure to re-bleed both the brakes and the clutch before getting underway with your rebuilt engine after you fire it up the first time. (On jack stands) Check for leaks at any connection point. Make corrections as needed. Life experience has taught me this is a VERY good idea.
You can destroy the gearbox with one or two shifts without sufficient disengagement of the clutch (cost me a grand plus the time to pull and replace the trans & engine) And leak down on the brakes forced me to find alternatives for stopping safely when I had to pull my car out of the shop of a nefarious paint and body guy a couple of years back. That's when I decided to do the job myself, following your suggestions! For before and after click on my two Marilyn pictures next to my icon above.
Edited 2 time(s). Last edit at 2014-04-18 08:33 AM by favedave.
|
|
Topic Creator (OP)
Apr 18, 2014 08:55 AM
Joined 16 years ago
3,155 Posts
|
Wow, Marilyn is a totally new girl! Very impressive.
Last night I adjusted the brake free play. I knew it was way too long, and didn't realize that the brake light switch controlled it. A quick forum search educated me on that.
Pedal feels pretty good. No leaks now (found a couple when bleeding - both lines from the rear axle splitter were a bit loose), but I'll keep an eye on it. I'll spring for the Motive adapter, and rebleed with it when it comes in, which will be well before I hit the road. The Motive will come in handy when I do maintenance flushes, anyway. Eventually it'll pay for itself.
Haven't done the clutch bleed yet, I might wait till the engine is in, or rig up something to keep the push rod under control and do it prior. Not sure yet.
Thanks for the feedback and advice, it's much appreciated.
Documenting my project in my journal at https://www.mgexp.com/home#journal
 |
Apr 18, 2014 09:00 AM
Top Contributor
Joined 12 years ago
2,797 Posts
|
 |
Apr 18, 2014 09:30 AM
Joined 11 years ago
3,036 Posts
|
Clutch bleeding is easy. Fill it with fluid and open the bleeder until you get a drip from the bottom. Now, close the bleeder. Sit in the car and play with the clutch pedal. Some short quick strokes, some long full strokes. Keep an eye on the reservoir and add fluid as needed. If you have someone do the same thing and can somehow watch the master cylinder, you'd see bubbles rising to the top of the fluid. Thing practically bleeds itself.
1973 MGB: Blow through supercharged, intercooled, 10psi boost. VP12 cam, aluminum flywheel, 8.9:1 compression. Black label OD, Saab 15” minilites. Goes a lot better than it looks.
1973 MGB: Blow through supercharged, intercooled, 10psi boost. VP12 cam, aluminum flywheel, 8.9:1 compression. Black label OD, Saab 15” minilites. Goes a lot better than it looks.
 |
Apr 18, 2014 09:52 AM
Joined 12 years ago
1,070 Posts
|
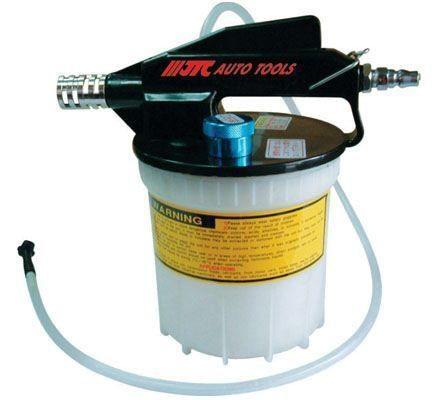
I used to do some part time shop work for extra cash and they had a bleeder called Vacula, it hooked up to the shop air line and clipped over the bleeder. It had a nice reservoir to catch the fluid. You opened the master, filled it, then turned on Vacula and it pulled the fluid through. Worked really well. You just had to watch to make sure you didn't pull the mc dry and have to start over. No special adapter caps required. Nice rig although I have not seen one since.
Eric - xcoastie
ET2/E5 Vessel Shore Electronic Support USCG Station Great Egg 81 - 85
1974 Last of the chrome bumpers with Sabrina's
1971 Engine
4 speed synchro, non OD
"A work in progress"
Eric - xcoastie
ET2/E5 Vessel Shore Electronic Support USCG Station Great Egg 81 - 85
1974 Last of the chrome bumpers with Sabrina's
1971 Engine
4 speed synchro, non OD
"A work in progress"
|
|
Apr 18, 2014 10:09 AM
Joined 12 years ago
1,070 Posts
|
Forums 
Having trouble posting or changing forum settings?
Read the Forum Help (FAQ) or contact the webmaster
